Showing posts with label Samba. Show all posts

Friday, August 30, 2013

mount error(115): Operation now in progress ... CIFS VFS: cifs_mount failed w/return code = -115

SkyHi @ Friday, August 30, 2013
Trying to mount a CIFS path in Ubuntu and getting:
?
1
mount error(115): Operation now in progress
First thing to try is to look into /var/log/syslog:
?
1
2
Feb  9 14:08:29 ldap kernel: [143452.140157] CIFS VFS: Error connecting to socket. Aborting operation
Feb  9 14:08:29 ldap kernel: [143452.140492] CIFS VFS: cifs_mount failed w/return code = -115
Socket error, we know what this is right? IP or port. Ping for domain/IP or Telnet to test port:
?
1
2
ping IP
telnet IP 445
My case? Telnet was timing out, port closed for IP in firewall.

REFERENCES
http://thinkinginsoftware.blogspot.com/2013/02/mount-error115-operation-now-in.html

Tuesday, April 10, 2012

Having problems browsing SAMBA shares? ..README

SkyHi @ Tuesday, April 10, 2012
I've seen "SAMBA isn't working, now I can't connect to shares on my HTPC" being posted in a few places so I thought I'd post a note to educate people on what's going on. The statement that SAMBA is broken is rarely true. It's usually running fine, and the cause of the problem is simply the ugly way that NetBios over TCP/IP name resolution works. 

The reason you cannot see an smb://share "that was working 5 mins ago" is down to browser election fights between the computers on the network. An election fight is a peer-to-peer negotiation over who gets elected to be in charge of the domain(s) and/or local master browser list; the list of computer names that will appear in the Windows Network Neighbourhood (or it's current equivalent). The machine that wins the election is determined through a combination of uptime, OS version and config settings - meaning the outcome can be unpredictable, and the election process can take time (minutes not milliseconds). Over time your HTPC (as longest uptime device) has probably been elected the master browser, so if you reboot your HTPC the browser list is gone and the remaining machines on the network will restart an election process to decide who owns/creates the replacement. Once the election is over it will take time (again, minutes not milliseconds) to distribute the list and ensure every client has the same version. If you reboot other computers they will join the network and announce their availability, so an election discussion takes place to see if they should become the master browser. It's easy to see how this process may go titsup.com from time to time. Sadly, Mac and Linux computers can suffer the same issues as their Windows counterparts as they (via their local SAMBA client) are ultimately participating in the same process.

In corporate networks this issue is mitigated by having a pre-determined machine configured to win all the elections and maintain the browser list(s) - usually a domain controller. Rigging the election guarantees the election result and ensures the election process is completed quicker. The good news is that it's simple to configure SAMBA on your OE based HTPC to do the same thing. The reason for picking the HTPC to be the master browser is that it's probably the going to be the computer that has the highest uptime in your home network.

First, ensure you have /storage/.config/samba.conf. If you don't there is a sample one in the directory that can be renamed. Then add the lines indicated below to your [global] section:

[global]
  server string = Media Centre(%i)
  workgroup = HOME
  domain master = yes  <-- add this line
  local master = yes  <-- add this line
  preferred master = yes  <-- add this line
  os level = 100  <-- add this line
  netbios name = AppleTV
  security = share
  guest account = root
  socket options = TCP_NODELAY IPTOS_LOWDELAY SO_RCVBUF=65536 SO_SNDBUF=65536
  wins support = yes
  syslog only = yes
  name resolve order = lmhosts wins bcast host
  printcap name = /dev/null
  load printers = no

Even if you do this the problem will never be completely eliminated, but Windows network browsing should in theory be more consistent (in theory!). If it does not clear the problem the solution is usually to "turn everything off and on again" so that the old (incorrect) browser list is lost and a new (correct) one is created, or access your HTPC directly via an IP address based URL, e.g. \\192.168.1.2\ 

NB: in pre-RC6 setups the last two lines shown above (printcap name and load printers) were incorrectly placed under the [printers] section of the sample configuration file. If you move them to [global] as above you'll see some SAMBA startup errors in /var/log/messages go away.

REFERENCES

Windows can’t see Samba Share

SkyHi @ Tuesday, April 10, 2012
For those of you who are using Samba on Linux (including Ubuntu) systems and would like to be able to have Windows users see your server in their “Network” discovery browser, here’s what you need to do.
The following is required to get windows to see your samba share so you no longer need to type in the IP address of your server every time you want to access it on a new system.
With your favourite text editor, open smb.conf:
vim /etc/samba/smb.cnf
Add this to the top of the file:
wins support = yes
You may also want to check to ensure that wins support configuration doesn’t exist in any other part of the configuration file.
After this is done, restart samba and Windows should be able to see your share!
service samba restart


REFERENCES

Wednesday, October 19, 2011

Mac OS can't connect to SMB shares after sleep

SkyHi @ Wednesday, October 19, 2011
http://superuser.com/questions/144327/mac-os-cant-connect-to-smb-shares-after-sleep
http://blog.djmnet.org/2009/02/09/macs-needing-unix-network-geekery/

Tuesday, July 5, 2011

Configuring a SAMBA Print Server

SkyHi @ Tuesday, July 05, 2011
You may be using Linux at home or in an office environment, but often we still need to provide access to Windows desktops. Begin Linux has taken you though setting up a SAMBA Domain Controller and File Server on openSUSE 11.4. In this tutorial, again using openSUSE 11.4 we will take the time to look at adding in Print Server capabilities. Providing Windows Users have transparent access to printing. The assumption is made that SAMBA is already installed and running on your Linux Server.
We will setup a CUPS (Linux printing) but no great detail of Linux printing is entered into as we are concentrating on SAMBA printing.
For the purpose of this tutorial is not important that your machine is a Domain Controller, although ours will be.


Overview of CUPS printing and creation of a Linux Printer

CUPS, or the Common UNIX Print System, is prevalent in most Linux distributions these days and has been for many years. If we share printers to our network with CUPS then we can print using IPP (Internet Printing Protocol) from our client. As such we should see TCP port 631 open for this purpose if we choose to look with tools such as netstat.
Setting up a CUPS printer could not be easier with openSUSE and YaST especially if, as many homes and businesses do, you have an HP printer model. You can see from the YaST Add Printer Wizard below that there is a “Run hp-setup” tool in the bottom right. This will detect and configure your HP Printer for CUPS printing.

Samba Print Server CUPS

The wizard will start and in this example we select that the printer is on the Network via the Discovery Window. The printer is directly connected to the network.

Samba Print Server Setup
Samba Print Server

The printer is then up and running and available to the Linux Desktop / Server. We can choose to share it via CUPS to our network and print to it from Windows using IPP, this is not the best method as the print driver is not shared, only the printer.
If we share the print driver as well as the printer, users do not need to configure printing and require no additional rights to their machines. For this we require a SAMBA Print Server.
This HP printer will only be shared via SAMBA so we do not need to configure Printer Sharing in YaST. The SAMBA Server prints locally to the CUPS printer so it does not need to be shared by CUPS.
With the wizard complete we now need to look at making this printer and the print driver available to our Windows Users though SAMBA.

Reviewing our Share Definitions to ensure the Linux Printer shares to Windows

The nice feeling that I always have at this point, is in the knowing that the SAMBA defaults to share all printers. We should check this to ensure that we have not missed anything and to complete our understanding of the contents of the /etc/samba/smb.conf file.
Samba Print Server smb.conf
From the extract above we can see:
  1. [printers] share: sharing all our Linux Printers. We can control access to the printers via Access Control List on the printer once configured.
  2. [print$] share: Always present on a Windows Print Server and hosts the print drivers for the clients. The location of this share is shown and we should see the path /var/lib/samba/drivers. You can change the location but there is no real advantage in doing so.
The path shown does exit but only holds a top level structure to represent hardware platforms. It does not contain any drivers. We have to add the Windows drivers to match the OS and Platform of our clients. So if we use 32 bit versions of Windows XP we must add the required drivers for all our printers into the directory: /var/lib/samba/drivers/W32X86. Drivers are easily added using the correct Windows OS and logged in as root. The graphic shows the directory structure (and the empty W32X86 directory) of the print$ share.

Samba Print Server Directory Structure

Windows Printer Drivers and the Print$ share

We will now move away from Linux to manage the print share from a Windows XP client, assuming we wish to add XP drivers. In this way we can add Windows drivers for the shared printer to the print$ share on the server.
We are working in a SAMBA Domain environment which we have already set-up with Begin Linux tutorials. Having created our Domain Administrators group, to ensure correct permissions, we are able to manage printers as the root user. The root user has also been SAMBA enabled. The XP workstation has been added to the BEGINLINUX domain in the normal manner using the System Control Panel. From the graphic below we will log in as root to the XP Workstation having joined the domain and restarted Windows.

Samba Print Server XP Workstation Added

In the setup of the SAMBA domain we have already made sure that root and other administrators have correct rights to manage Domain Machines by nominating a Linux Group to be Windows Domain Administrators.

net groupmap add ntgroup=“Domain Admins” unixgroup=domadmin rid=512 type=d
We can verify that this is set correctly and effective on the XP Workstation by checking the membership of the local administrators group, it should have BeginLinux\Domain Admins in its membership list.

Samba Print Server XP Workstation Added

So now we are in the Domain, (if it is a workgroup then just log on to XP locally and when we connect to the Print Server adding the root username and password then), you will need to connect to the Print Server using its’ name or IP Address. In the example the IP Address of the Server is used. From the start menu on Windows XP choose run and in the dialogue box type \\192.168.0.110 or at least the IP Address or Server Name or your Print Server.

Samba Print Server Administrators

If all is working then we should be displayed a list of shares including the printer share. We do not connect to the printer share but rather to “Printers and Faxes”. This will allow us to manage the Samba Printer instead of just connecting to the printer (HP) in the graphic following.

Samba Print Server Run

From within “Printers and Faxes” right-click on the HP printer and choose “Properties”. A dialogue will warn you that you have not added a driver yet. Select to “Add a Driver Now” and from the Windows selection box choose your printer model, or Have Disk if you need to load a driver that is not available to Windows.
NOTE: Now this is the strange bit, it does not add the driver at this stage. Choose the Advanced Tab and select New Driver. This will add the print driver to the share. I always select an incorrect driver from the first selection then with New Driver I add the correct driver, but we have to do this extra step even though it does not seem to make a lot of sense.

Samba Print Server
If you look at the driver being copied, once the wizard is complete, you will see that this time the driver is copied to the print$ share and the correct subdirectory. See below:

Samba Print Server Copying Files

Finally let’s look at the share to see what we have added: from the run command, again, select \\192.168.110\print$, (adjusting to your server details). You should see a result similar to this is in the W32X86 directory. Look carefully at the address bar to gauge how it will appear on your system.

Samba Print Server
From this point forward users just need to double-click on the HP printer share to add the driver to their own system without any elevated rights. The driver from the Print Server loads in RAM on the client. For each shared CUPS printer you will need to repeat this procedure. For the home or small office though one or two printers is about what you would expect. But there you have it, you have now set up printing via SAMBA on openSUSE 11.4
If you enjoyed this openSUSE tutorial by Andrew Mallett, please visit the openSUSE tutorial section for a complete list.

REFERENCES

Wednesday, May 18, 2011

FreeNAS 8.0 SAMBA/CIFS user accounts

SkyHi @ Wednesday, May 18, 2011
I have some troubles to configure samba user accounts and user authentication. First of all let me show what have I done already:

I made new dataset for samba share:

Image

I made new user samba with group samba:

Image

I gave user samba all permissions and ownership to dataset:

Image

I configured cifs service with local user authentication:

Image

I configured new samba share:

Image

Enabled CIFS/SMB service.

Mounting share from another linux box:

Code: Select all
smbclient -U samba '\\server\samba' samba1


and got:

Domain=[server] OS=[Unix] Server=[Samba 3.5.6]
tree connect failed: NT_STATUS_ACCESS_DENIED


Also tried:
Code: Select all
mount //server/samba /mnt -o username=samba,password=samba1


and got:

13880: tree connect failed: ERRDOS - ERRnoaccess (Access denied.)
SMB connection failed


In samba log file I found:

[2011/05/03 13:28:40.016645, 2] smbd/service.c:587(create_connection_server_info)
guest user (from session setup) not permitted to access this share (samba)
[2011/05/03 13:28:40.016699, 1] smbd/service.c:678(make_connection_snum)
create_connection_server_info failed: NT_STATUS_ACCESS_DENIED


What have I missed?? All I whant to achieve is that only user samba can mount and access share samba.

This is samba share section from smb.conf:
[samba]
path = /mnt/storage/samba
printable = no
veto files = /.snap/
comment = samba share
writeable = yes
browseable = no
inherit permissions = no
valid users = samba  ##Windows prompt for authentication

REFERENCES
http://sourceforge.net/apps/phpbb/freenas/viewtopic.php?f=46&t=10813&sid=26a3368dcd0cb44a3a33da39b19fe474

Sunday, September 12, 2010

samba permission 777

SkyHi @ Sunday, September 12, 2010

Change Samaba Permission
1. Right Click Properties, under Security Tab --> select Everyone -->Click Edit

2. Select Everyone -> Check Full control Box --> Click Apply

Or

1. Right Click Properties, under Security Tab --> select Everyone -->Click Advanced
2. Permissions Tab --> Select Allow Everyone -> Click Change Permissions
3. Permissions Tab shows up --> Select Allow Everyone --> Click Edit
4. Select Full Control and Click OK


View Samba Permission


1. Security Tab -> Select Everyone -> Click Advanced


2. Permissions Tab -> Select Everyone  -> Click Change Permissions

3. Permission Tab pops up -> Select Everyone again -> Click Edit

4. Result show as below

Thursday, September 2, 2010

HOWTO Disable printing in Samba

SkyHi @ Thursday, September 02, 2010
Samba has printing support enabled by default. To disable printing support, use the following configuration settings in /etc/samba/smb.conf:
load printers = no
 printing = bsd
 printcap name = /dev/null
 disable spoolss = yes
Now, restart Samba. No more printing support

REFERENCES
http://consultancy.edvoncken.net/index.php/HOWTO_Disable_printing_in_Samba

Monday, June 28, 2010

How to mount remote windows partition (windows share) under Linux

SkyHi @ Monday, June 28, 2010

All files accessible in a Linux (and UNIX) system are arranged in one big tree, the file hierarchy, rooted at /. These files can be spread out over several devices. The mount command serves to attach the file system found on some device to the big file tree.


Use the mount command to mount remote windows partition or windows share under Linux as follows:


Procedure to mount remote windows partition (NAS share)


1) Make sure you have following information:

==> Windows username and password to access share name

==> Sharename (such as //server/share) or IP address

==> root level access on Linux


2) Login to Linux as a root user (or use su command)


3) Create the required mount point:

# mkdir -p /mnt/ntserver

4) Use the mount command as follows:

# mount -t cifs //ntserver/download -o username=vivek,password=myPassword /mnt/ntserver


Use following command if you are using Old version such as RHEL <=4 or Debian <= 3:

# mount -t smbfs -o username=vivek,password=D1W4x9sw //ntserver/download /mnt/ntserver


5) Access Windows 2003/2000/NT share using cd and ls command:

# cd /mnt/ntserver; ls -l

Where,


  • -t smbfs : File system type to be mount (outdated, use cifs)
  • -t cifs : File system type to be mount
  • -o : are options passed to mount command, in this example I had passed two options. First argument is password (vivek) and second argument is password to connect remote windows box
  • //ntserver/download : Windows 2000/NT share name
  • /mnt/ntserver Linux mount point (to access share after mounting)

Configure a system to automount a Samba share with /etc/fstab


As explained earlier you can use the mount command to mount a remote windows partition or a windows share under Linux.


/etc/fstab file contains static information about the filesystems. The file fstab contains descriptive information about the various file systems. fstab is only read by programs, and not written; it is the duty of the system administrator to properly create and maintain this file.


To mount a Samba share to be mounted when a Linux system comes up after reboot edit the /etc/fstab file and put entry as follows for your Windows/Samba share:

//ntserver/share /mnt/samba smbfs username=username,password=password 0 0


For example, if you want to mount a share called //ntserver/docs then you need to write following entry in /etc/fstab file://ntserver/docs /mnt/samba smbfs username=docsadm,password=D1Y4x9sw 0 0Where,


  • //ntserver/docs: Windows 2003/NT/Samba share name
  • /mnt/samba: Local mount point (you may need to create this directory first)
  • smbfs: File system type (samba file system)
  • username=docsadm,password=D1Y4×9sw: Share username and password

Open file /etc/fstab using vi text editor:# vi /etc/fstabAppend line //ntserver/docs /mnt/samba smbfs username=docsadm,password=D1Y4×9sw 0 0, at the end your file should read as follows:


proc            /proc           proc    defaults        0       0
/dev/hdb1 / ext3 defaults,errors=remount-ro 0 1
/dev/hdb2 none swap sw 0 0
/dev/hdc /media/cdrom0 iso9660 ro,user,noauto 0 0
//ntserver/docs /mnt/samba smbfs username=docsadm,password=D1Y4x9sw 0 0

Replace sharename, username and password with your actual parameters.


REFERENCES

http://longvnit.com/blog/?p=1072

Friday, February 26, 2010

Create a Public Share on Samba

SkyHi @ Friday, February 26, 2010

The goal of this tutorial is to show you how to set up a public share on your Samba server that can be used by everyone on your network with all rights. This will enable everyone on a Windows machine to access this without a password.  Of course, this has security implications but it is a good way to get something working.  The next article will show you how to create a share for one user in which that one user is the only one who can access the share.

1. Install Samba
yum install samba samba-client samba-common

chkconfig  – -level 35 smb on

service smb start

2. Create a New smb.conf file

First,  change the  default smb.conf file to a backup copy, and then create a whole new one.

# mv smb.conf smb.conf.backup
# vim smb.conf

Here’s the new smb.conf file:
Note the workgroup should be the workgroup that you are using on your Windows machines.

[global]
netbios name = linuxserver
workgroup = WORKGROUP
server string = Public File Server
security = user
map to guest = bad user
guest account = smbguest

[public]
path = /public
guest ok = yes
read only = no

3. Test with testparm
This will help you determine if you have any major problems with the set up you placed in smb.conf.

# testparm
Load smb config files from /etc/samba/smb.conf
Processing section “[public]”
Loaded services file OK.
Server role: ROLE_STANDALONE
Press enter to see a dump of your service definitions

[global]
server string = Public File Server
map to guest = Bad User
guest account = smbguest

[public]
path = /public
read only = No
guest ok = Yes

4. Create a public user
Since the purpose is to  map the users to a special guest account,  open the /etc/passwd file for editing, and add the following line to the end of the file.

smbguest:x:525:525:Samba Guest Account:/dev/null:/bin/false

This creates the guest account.  Now, create a smbguest group with a group ID, here the GID of 525 was used, it does not matter which number as long as it is not used and over 500.

# groupadd -g 525 smbguest

Now, change to the root of the file system, and create the new directory that  to share.

# mkdir public

# chown -R smbguest:smbguest public

# ls -l
drwxr-xr-x 2 smbguest smbguest 184 2007-08-03 15:18 public

5. Access the share from Windows
Once you create public folder it should be visible on the network from an XP machine.

Expand “My Network Places”, and then expand “Workgroup”.  You’ll then see all of the members of the workgroup that’s named “Workgroup”.  Note also that you can have other workgroups with different names.  Even though a Windows computer can only be a member of one workgroup at a time, Windows Explorer will still show all workgroups that are on the network.


REFERENCE

http://beginlinux.com/blog/2010/01/create-a-public-share-on-samba/


Samba Tutorial: Create Private User Shares

SkyHi @ Friday, February 26, 2010

If you use Samba you certainly want to create shares which provide users with private shares.  This tutorial will show you how to create a share that is accessible to one user to store their information.

Security Mode
The typical security mode that you will use for a simple user share is security = user.

Choosing a Database Type for Passwords
smbpasswd–A text-mode flat database.  You can use this on a stand-alone Samba server, but you don’t want to use it in a domain.
tdbsam–This is a regular database file, which can store a richer set of attributes than what the smbpasswd file can.  You can use it for either stand-alone Samba servers, or in a domain that’s running a single domain controller.
ldapsam–This type of database is set up with an ldap directory for its backend.  You can use this in a domain with multiple domain controllers.  You don’t want to use it for either stand-alone Samba servers, or for domains with single domain controllers.

Home Directories
This will create home directories on your Samba server that users can access from their Windows clients.  That way, everyone can have one central directory that they can access regardless of which client station they use to log on.  As a security precaution for the Linux server, users when created will not have access to login to the Linux server and get a shell, they will only be able to access their shares, typically from Windows.

Edit the /etc/smb.conf file.

[global]
netbios name = linuxserver
workgroup = WORKGROUP
server string = Public File Server
security = user
map to guest = bad user
guest account = smbguest
encrypt passwords = yes
passdb backend = tdbsam

[tom]
comment = Home Directory
path = /home/tom
valid users = tom
browsable = no
guest ok = no
read only = no

[public]
path = /share/public
guest ok = yes
read only = no

In the [global] section, encrypted passwords are used  and stored  in a “tdbsam”-type file.  You could get by with using an “smbpasswd”-type file for this example.

The [tom] share is a simple share for a user on the samba server.  In the [tom] section,  a comment line was added , which specifies what shows up in the comment column of a Windows Explorer detail display.  The “valid users = tom” line is what keeps people out of other people’s home directories.  And, you don’t want users’ home directories to show up in a Network Neighborhood display, so the “browsable = no” line is added.

Next, create a Linux-type user account for  tom.

# useradd -c “tom” -m -s /bin/false tom

The “-s” option switch, followed by the “/bin/false”, is what prevents tom from logging on to the Linux system.  The “-m” switch is what creates tom’s home directory.  There’s no need to give tom a password for this account as the password that is used will be with smnpasswd.

Next, create tom’s Samba account and give it a password.

smbpasswd -a tom
New SMB password:
Retype new SMB password:
Added user tom.

This command will add tom’s account information to the “passdb.tdb” file that’s found in the /var/lib/samba directory.

Restart Samba to reload the new configuration.

# service samba restart
* Stopping Samba daemons…                                                         [ OK ]
* Starting Samba daemons…                                                         [ OK ]

That should do it, tom now should be able to login to a user share just set up for him.

Login From Windows
Right click your My Computer and select “Map Network Drive”.  Select a drive letter, like “L” and then enter your Samba server IP and the share name.

\\192.168.5.89\tom

Connect and it should ask for user and password.


REFERENCE
http://beginlinux.com/blog/2010/01/samba-tutorial-create-private-user-shares/


Monday, February 22, 2010

Macbook and Vista Master Browser

SkyHi @ Monday, February 22, 2010

Are you trying to network a macbook with your workgroup?

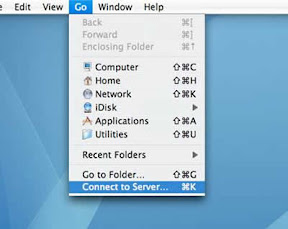
Well luckily enough its relatively easy to do... Most of the time. This Discussion Details all the steps you need to consider if your having trouble and have already tried the nice and easy step by step guide to sharing files on a mac. I unfortunately followed these steps and yes i could use the "cmd-k" connect to server option, type in the name of the server. using smb://computername/sharename works for me so that's what I'm using now. See this website for step by step guide to this proccess. Along my journey to settling for this 'work around' (I know its not really a work around but you will see why after my little story below). My desired results were: "Set all my computers to the same workgroup", (Vista, Windows 7, Windows XP, Mac OSX) and allow them to be visible in each others "network browser windows", so you can just 'browse' and click. Lucky for me this was all working for the XP, Vista and Windows 7 PC's, but I could not get the macbook to 'see' the windows based computers. This is the summary of the problem and some commands I found and used along the way. It should be mentioned here that the problem was as follows:
When Vista is the Master Browser the Mac cannot see any computers in the "network". But obviously still can connect using "connect to server" manually. When XP is the Master Browser the Mac can see any computers in the "network".
How to determine which computer is the Master Browser Simple If you can turn all the computers off on your network besides two of them. Mac - XP Mac - Vista In those combinations to see if the Mac can see the network computers. This is what i did, turned off vista machine and XP became the master browser. (Note: if your comfortable you can use the Start->Run->Services.msc and stop the computer browser service to have the same effect, this is what i found and efficient way to cause re-elections.) On the PC
  • Bring up a command window. (Start->Run->cmd)
  • Type: "net view" (not including "'s)
  • You should see a list of computers, \\computername
  • Then you can use the command: "nbtstat -a computername" Where computername is one of the machines in the list. on each machine untill you find the one with "..__MSBROWSE__." in the list of results. This is the current master browser.
On the Mac
  • Bring up a Terminal Window (Utilities, Terminal)
  • Type: "nmblookup -M -- -." (not including "'s)
  • This should give you the IP of the Master Browser. xxx.xxx.xxx.xxx
  • (Note the -- -. in my understanding is how to get the - symbol. The -- and . must be how to escape the characters otherwise - would be treated like the - in the -M command.)
  • Then you can run, nmblookup -A xxx.xxx.xxx.xxx (Where xx's represent the IP you got from the command before.
  • This then should list the Netbios names of the Master browser and the workgroups.
  • You will also see "..__MSBROWSE__." which indicates its the master browser.

Now What? If you have discovered like me that you cannot see a list of computers when Vista is the master browser, then these are the options i'm aware of.
  • a) Stop vista from becoming a master browser. (Registry Edit or diable browser service)
  • b) Enable the Mac to become a master browser. (terminal->sudo nano /etc/smb.conf, you are looking for os level = 2 and local master = no, You might want to do some more research of your own before modifying these settings.)
  • c) Just use the connect to server option on the mac.
I'm experimenting with B and C. Hopefully this problem will go away after a vista patch or when i roll my machines over to Windows 7.


vladimir said...

I may have found a solution to this issue. After reading your article, I began a rather exhausting searching for Win7 Master Browser issues.

Run services.msc on Windows 7 machine

Browse down to Computer Browser and double-click

To test the fix, stop the service and wait 5-10 minutes to see if the Windows 7 machine appears either in the Shared section of the Mac's sidebar in a window or by pressing command-k and click the browse button on the Mac.

If this test works, go back to services.msc on the Windows 7 machine and disable the Computer Browser service. Restart the Windows 7 machine and after about 5 minutes and check to see if the Windows 7 machine can see the other computers on the network, (you will need to set up PC file sharing on the Mac).

If both scenarios work, problem solved!


REFERENCE
http://robmulally.blogspot.com/2009/03/macbook-master-browser-and-my-mate.html


Description of Master Browser in the Microsoft Network

SkyHi @ Monday, February 22, 2010
The computers listed in the Network Neighborhood comes from the Browser-list maintained by the computer being Master Browser. A computer can become Master Browser through an election where the computer with the highest priority is elected.

There are different roles for computers participating in a Microsoft Network :
  • Non-Browser: Cannot participate in the election or maintain a Browser-list. Reports to the Master Browser with 12 min. intervals, and presumed dead by the Master Browser if it hasn't reported in 3 intervals.
  • Potential Browser: Able to be Master Browser if elected and can be chosen as Backup Browser by the Master Browser. Reports back like the Non-Browser and if the Master Browser disappears it can start an election.
  • Backup Browser: Elected by the Master Browser to mirror the Browser-list. Every 15 min. the Backup Browser requests an updated Browser-List from the Master Browser. There is a Backup browser elected for every 32 computer.
  • Master Browser: Responsible for maintaining the Browser-list by adding and removing computers for a single subnet.
  • Domain Master Browser: (Primary Domain Controller) Responsible to maintain the Browser-list in a Domain. It collects Browser-lists from all Master Browsers and distributes the entire Browser-list to all Master Browsers in the domain.
A computer's priority in the election depends on the operating system:
  • Windows For Workgroups or Windows 9x : 0x01000000
  • Windows 2000, NT4, XP Prof. : 0x10000000
  • Windows 2000, NT4 Srv. : 0x20000000
A computer's priority in the election depends on the configuration:
  • Primary Domain Controller(PDC) : 0x00000080
  • WINS System : 0x00000020
  • IsDomainMaster = Yes : 0x00000008
  • Running Master Browser: 0x00000004
  • MaintainServerList = Yes : 0x00000002
  • Running Backup Browser: 0x00000001
Note if a computer is frequently turned On/Off or having few resources available(Mobile Computer), then one should configure it as Non-Browser so it won't start unnecessary elections.

Note if having a LAN where one computer is configured to belong on a different subnet than the default or if the computer for some other reason cannot see the current master browser (Usually the Primary Domain Controller). Then this computer will constantly issue Master Browser election, because it cannot find a Master Browser. This can lead to a blank Browser-list for all the computers in the LAN.

Note if a router is used to connect two LANs and it is configured wrong, then the two LANs will affect each other in the Master Browser election. This can lead to a blank Browser-list for all computers in both LANs.

Note if a computer is multihomed (several network adapters connected to the same network), then it will not function properly as Master/Backup/Domain Browser, and should not participate in the election.

Configure which computer becomes Master Browser :
REFERENCE
http://smallvoid.com/article/windows-master-browser.html