Saturday, August 8, 2009

Linux Tips

SkyHi @ Saturday, August 08, 2009
http://www.cyberciti.biz/faq/sections/

http://ubuntu-tutorials.com/

Friday, August 7, 2009

Format External USB hard drive Partition

SkyHi @ Friday, August 07, 2009


$dmesg
$sudo mkfs.ext3 /dev/sda1


##Graphic Partition Manager


1. nikid@Januty:~$sudo gparted
2. Select from menu GParted --> Device
3. Right click your drive and Format it


Ubuntu Firewall Builder

SkyHi @ Friday, August 07, 2009

Getting Started with Firewall Builder

This article is part of a series regarding firewalling and network security using the Firewall Builder tool on Ubuntu. This is user-contributed content. If you would like to contribute an article, please see the About page for contact information.

Getting Started with Firewall Builder

Author: vadim@fwbuilder.org

http://www.fwbuilder.org

This guide starts a series of articles about Firewall Builder. Firewall Builder (also known as fwbuilder) is a GUI firewall configuration and management tool that supports iptables (netfilter), ipfilter, pf, ipfw, Cisco PIX (FWSM, ASA) and Cisco routers extended access lists. Both professional network administrators and hobbyists managing firewalls with policies more complex that is allowed by simple web based UI can simplify management tasks with the application. The program runs on Linux, FreeBSD, OpenBSD, Windows and Mac OS X and can manage both local and remote firewalls. The first article is an introduction to the program. We will follow up with series of articles focusing on more advanced aspects of it in the coming weeks.

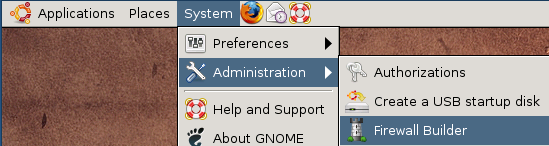
Firewall Builder is packaged with most Linux distributions and is available under “System/Administration” menu.

If it is not there, then it probably needs to be installed on your system. You need to install package that has supporting API library libfwbuilder and package fwbuilder that contains Firewall Builder GUI and policy compilers. Use apt-get or aptitude to find and install them:

# aptitude install libfwbuilder fwbuilder

On FreeBSD and OpenBSD Firewall Builder is part of ports, you can find it in /usr/ports/security/fwbuilder.

Packages shipping with Ubuntu are always one or two minor revisions behind. If you want to try the latest version, you can use pre-built binary .deb packages offered on the project’s web site or build from source using our online installation instructions. Pre-built binary packages can be installed using our repositories of rpm and deb packages, see instructions on this page.

If the system menu item is not there or you have built the program from source, you can always launch it from the command line by just typing “fwbuilder” on the shell prompt:

$ fwbuilder

The program starts and opens main window and greeting dialog. The dialog provides links to the project web site where you can find more tutorials, FAQ, Firewall Builder CookBoook and other documentation, as well as bug tracking system and links to user forums and mailing list. Clicking on the link in the dialog opens corresponding web page in your web browser. This works the same on all supported OS: Linux, Windows and Mac OS X. You can always open this dialog later using an item in the main menu “Help”.

pict_010

Lets create our first firewall object. To do this, we’ll use object creation menu that appears when you click on the icon in the small toolbar right above the object tree. Choose menu item “New Firewall” from the menu that appears.

pict_020

The program presents wizard-like dialog that will guide you through the process of creation of the new firewall object. In the first page of the wizard you can enter the name for the new firewall object (here it is “guardian”), its platform ( “iptables”) and host OS (”Linux”).

There are two ways new firewall can be created: you can use one of the preconfigured template firewall objects or create it from scratch. This tutotiral demonstrates the first method (using template object). To do this, check checkbox “Use pre configured template firewall objects”. Template can be taken from the library of template objects that comes with Firewall Builder package or from a file provided by the user. The latter is useful when administrator wants to distribute a library of predefined templates to other users in the enterprise. We are using one of the standard templates in this guide and therefore leave standard template library path and name in the “Template file:” input field. Click “Next” to move on to the next page of the wizard.

Note that template firewall object comes completely configured, including addresses and netmasks of its interfaces and some basic policy and NAT rules. This configuration is intended as a starting point only. You should reconfigure addresses of interfaces to match those used on your network and most likely will have to adjust rules to match your security policy.

pict_030

This page of the wizard shows template objects and their configuration. Standard template objects represent firewalls with two or three interfaces, a host with one interface, web server or Cisco router. Choose firewall with three interfaces for this guide. Note that template comes with completely configured firewall object, including set of interfaces and their ip addresses and some basic firewall policy. You will see how addresses can be changed later on in this guide. Click “Finish” to create a new firewall object using chosen template.

pict_040

Here is our new firewall object. Its name is guardian, it appears in the object tree in the left hand side of the main window in the folder Firewalls. When an object is selected in the tree, a brief summary of its properties appears in the panel under the tree. Double-clicking on the object in the tree opens it in the editor panel at the bottom of the right hand side panel of the main window. The editor for the firewall object allows the user to change its name, platform and host OS and also provides buttons that open dialogs for “advanced” settings for the firewall platform and host OS. We will inspect these little later in this tutorial.

You can always resize the main window to make all columns of the policy view be visible.

pict_050

Now would be a good time to save the data to a disk file. This is done in a usual way using main menu File/Save As.

Lets take a little tour of the network and service objects that come standard with the program. You can use these preconfigured objects to build policy and NAT rules for your firewall.

Objects in the tree are orginized in libraries, you can switch between libraries using drop-down menu above the tree. Firewall Builder comes with a collection of address, network, service and time interval objects in the library called “Standard”. Lets take a look at them. Notice that the background color of the panel that shows objects tree depends on the chosen object library. This makes it easier to keep track of the library currently opened in the program.

pict_060

Folder Objects/Hosts contains few host objects used in standard firewall templates. Folder Objects/Network contains network objects that represent various standard address ranges and blocks, such as multicast, net 127/8, networks defined in RFC1918 and so on.

pict_070

Firewall Builder also comes with extensive collection of TCP, UDP and ICMP service objects that describe commonly used protocols. This slide shows some TCP objects (all of them do not fit in the screenshot).

pict_080

Here is an example of a simple TCP service. It defines source and destination port ranges (in this case source port range is not defined and there is only one destination port 80). TCP service object can also define any combination of tcp flags the firewall should inspect and also which ones of them should be set in order for a packet to match this object. In the case of the service “http” we do not need to define any flags.

pict_090

Now lets take a look at the objects created as part of the new firewall object guardian. In order to do this, switch to the library User where this object was created. To open an object in the editor panel to inspect or change it, double click on it in the tree. Also, if you click on an object in the policy rule to select it, it will automatically open in the tree on the left.

pict_100

First, the firewall object itself.

Every object in fwbuilder has basic attributes such as its name and comment. Other attributes depend on the object type.

Attributes of the firewall object include platform (can be iptables, pf, ipfilter, etc.), version (platform-depended) and host OS. Buttons Host OS Settings and Firewall Settings open dialogs with many additional attributes that depend on the firewall platform and host OS. More on these later.

pict_110

Here are the choices for the firewall platform, version (for iptables) and host OS.

pict_103

Interfaces of the firewall are represented by objects located below the Firewall object in the tree. We refer to them as “children” of the firewall object. This slide demonstrates properties of the interface eth0. To open it in the editor double click on it in the tree. If editor panel is already open and shows some object, it is sufficient to select new object in the tree to reveal it in the editor panel (no need to double click).

IP and MAC addresses of interfaces are represented by child objects in the tree located below corresponding interface.

pict_120

Interface object has several attributes that define its function, such as “Management interface”, “external” etc.

  • Name: the name of the interface object in Firewall Builder must match exactly the name of the interface of the firewall machine it represents. This will be something like “eth0″, “eth1″, “en0″, “br0″ and so on.
  • Label: On most OS this field is not used and serves the purpose of a descriptive label. Firewall Builder GUI uses a label, if it is not blank, to show interfaces in the tree. One of the suggested uses for this field is to mark interfaces to reflect the network topology (’outside’, ’inside’) or the purpose (’web frontend’ or ’backup subnet’). The label is mandatory for Cisco PIX though, where it must reflect the network topology.
  • “Management interface”: Sometimes the host has several network interfaces in which case one of them can be marked as the ’manaagement interface’. The management interface is used for all communication between Firewall Builder and the host.
  • “External interface (insecure)”: marks an interface that connects to the Internet.
  • “Unprotected interface”: marks interface to which fwbuilder should not assign any access lists (used only with Cisco IOS platform)
  • “Regular Interface”: Use this option if the interface has an IP address assigned to it manually.
  • “Address is assigned dynamically”: Use this option if the interface has a dynamic address (obtained by means of DHCP or PPP or another protocol); in this case an address is unknown at the moment when Firewall Builder generates the firewall policy.
  • “Unnumbered interface”: Use this option if the interface can never have an IP address, such as the ethernet interface used to run PPPoE communication on some ADSL connections, tunnel endpoint interface, or an interface on a bridging firewall. See below Section 5.3.1 for more detailed discussion of these different types of interfaces.
  • “Bridge port”: this option is used for port of bridged firewall.
  • “Security level”: security level of this interface, used only with Cisco PIX (ASA)
  • “Network zone”: network zone of this interface, used only with Cisco PIX (ASA). Network zone drop-down list shows all network obejcts and groups of addresses and networks present in the tree. Choose one of them to tell the compiler which networks and blocks of addresses can be reached through this interface. Compiler uses this information to decide which interface each ACL rule should be associated with based on the addresses used in the destination of the rule.

pict_130

Here is IP address of interface eth0, external interface of the firewall. The address and netmask are attributes of the child object of the type “IPv4 address”. Here the address is “192.0.2.1″ and netmask “255.255.255.0″. Button “DNS Lookup” can be used to determine ip address using DNS. The program runs DNS query for the “A” record for the name of the parent firewall object.

pict_140

Lets look at the IP address of the internal interface of the firewall. The address used in the template is 192.168.1.1″ with netmask “255.255.255.0″. This is rather typical address used for small and home networks. Some commercial firewall appliances come preconfigured with this address.

pict_150

If address 192.168.1.0/24 matches address of your local network, you can skip this part of the guide and move to the page 4. Otherwise, you need to reconfigure the address of the internal interface of the firewall object that you just created in fwbuilder and also change address object used in the policy rules. Start with changing address attribute (and possibly netmask, if necessary) of the object guardian:eth1:ip as shown in the screenshot:

pict_160

Now we need to change IP address used in the rules. To do this, we create new Network object with correct address and replace object net-192.168.1.0 in all rules with this new network object.

Use new object menu to create Network object.

pict_170

New Network object is created with default name ‘New Network’ and IP address 0.0.0.0.

pict_180

Edit object name and address, then hit “Apply”.

pict_190

Use menu Object / Find to activate search and replace dialog. The Find and Replace dialog opens at the bottom of the right hand side panel in the main window, below the policy rules view.

pict_200

Locate object object net-192.168.1.0 in any policy rule where it is used or in its location in the tree in library Standard and drag and drop it to the left object well in the search and replace dialog as shown on the screenshot:

pict_210

Change the scope setting to “Policy of all firewalls”. If you have many firewalls in the tree, use scope “policy of the opened firewall” instead. Locate new Network object you just created in the tree and drag and drop it to the right object well in the search and replace dialog as shown on the screenshot:

pict_220

Now hit “Replace all” button. Pop-up dialog should appear and report how many replacements the program had to make in all rules of the firewall. Note that the replacement is done not only in the policy rules, but in NAT rules as well.

pict_230

Now that you have created a new object and replaced old network object with new one in all rules, do not forget to save data to a file using menu File/Save

Lets inspect properties of the firewall object. Double click on the firewall “guardian” in the tree to open it in the editor panel, then click “Firewall Settings” button in the editor. This opens new dialog that looks like this. Notice button “Help” in this dialog, clicking this button opens help as shown on the next slide.

pict_240

Online help explains all attributes and parameters located in each tab of the firewall settings dialog. I encourage you to explore it as many parameters are important and affect generated iptables script in different ways.

Next few screenshots show other tabs of the firewall settings dialog. You can find detailed explanations of all parameters in the online help.

pict_250

This page defines various parameters for the built-in policy installer. Installer uses ssh client (pscp.exe and plink.exe on Windows) to transfer generated script to the firewall machine and activate it there.

pict_260

User can define shell commands that will be included in the generated script at the beginning and in the end of it. These commands can do anything you want, such as configure some subsystems, set up routing etc.

pict_270

Parameters for logging.

pict_280

More options for the script generation. Notice that fwbuilder can produce iptables script in two formats: 1) as a shell script that calls iptables utility to add each rule one by one, or 2) it can use iptables-restore script to activate the whole policy at once. Other parameters are explained in the online help.

pict_290

Starting with v3.0 Firewall Builder can generate both IPv4 and IPv6 policy. This tab controls the order in which they are added to the script if user defined rules for both address families in the Policy objects of the firewall.

pict_300

Lets take a look at the policy of the template firewall. These rules are intended to be an example, a starting point to help you create your own policy quicker. Most likely you will want to modify them to suite your requirements. Explanation of the rules given here is rather brief because the goal of this guide was only to demonstrate how to use Firewall Builder.

  • Rule 0: this is an anti-spoofing rule. It block incoming packets with source address that matches addresses of the firewall or internal or DMZ networks. The rule is associated with outside interface and has direction set to “Inbound”.
  • Rule 1: this rule permits any packets on loopback interface. This is necessary because many services on the firewall machine communicate back to the same machine via loopback.
  • Rule 2: permit ssh access from internal network to the firewall machine. Notice service object “ssh” in the column “Service”. This object can be found in the Standard objects library, folder Services/TCP.

pict_310

Policy rules belong to the object “Policy”, which is a child object of the firewall and can be found in the tree right below it. As any other object in Firewall Builder, Policy object has some attributes that you can edit if you double click on it in the tree.

  • Policy can be either IPv4, or IPv4 or combined IPv4 and IPv6. In the latter case you can use a mix of IPv4 and IPv6 addess objects in the same policy (in different rules) and Firewall Builder will automatically figure out which one is which and will sort them out.
  • Policy can translate to only mangle table, or a combination of filter and mangle tables. Again, in the latter case policy compiler decides which table to use based on the rule action and service object. Some actions, such as “Tag” (translates into iptables target MARK) go into mangle table.
  • “Top ruleset” means that compiler will place generated iptables rules into built-in chains INPUT/OUTPUT/FORWARD. If policy is not marked as “top ruleset”, generated rules will go into user-defined chain with the name the same as the name of the policy object.

pict_320

Here are preconfigured NAT rules.

  • Rule 0: tells the firewall that no address translation should be done for packets coming from network 192.168.2.0 going to 192.168.1.0 (because Translated Source, Translated Destination and Translated Service are left empty)
  • Rule 1: packets coming to the firewall from internal and DMZ networks should be translated so that source address will change and become that of the outside interface of the firewall.
  • Rule 2: packets coming from the Internet to the interface “outside” will be translated and forwarded to the internal server on DMZ represented by the host object “server on dmz”.

pict_330

Now we should be ready to compile policy of the firewall guardian and generate iptables script. To do this, select firewall in the tree and click right mouse button. Choose item “Compile” in the pop-up menu. The dialog that appears lists all firewall objects defined in the objects tree and lets you select which ones should be compiled. The firewall guardian has just been created and has never been compiled and dialog shows that. Make sure checkbox next to the firewall object guardian is checked and click button “Next”.

pict_340

Firewall Builder calls policy compiler (which is by the way an external program which can be used on the command line). The next page of the dialog shows compiler progress and result.

pict_350

Compiler generates iptables script in the file with the name the same as the name of the firewall object, with extension “.fw”. The file is placed in the same directory where the data file .fwb is located.

$ ls -la test2.fwb guardian.fw

-rwxr-xr-x 1 vadim vadim 11253 2009-02-16 16:41 guardian.fw

-rw-r--r-- 1 vadim vadim 24696 2009-02-16 16:41 test2.fwb

Here is how generated script looks liie. This is just a fragment from the middle to show some generated iptables commands.


# ================ IPv4
# ================ Table 'filter', automatic rules

$IPTABLES -P OUTPUT DROP
$IPTABLES -P INPUT DROP
$IPTABLES -P FORWARD DROP

cat /proc/net/ip_tables_names | while read table; do

$IPTABLES -t $table -L -n | while read c chain rest; do

if test "X$c" = "XChain" ; then
$IPTABLES -t $table -F $chain
fi
done

$IPTABLES -t $table -X
done

$IPTABLES -A INPUT -m state --state ESTABLISHED,RELATED -j ACCEPT
$IPTABLES -A OUTPUT -m state --state ESTABLISHED,RELATED -j ACCEPT
$IPTABLES -A FORWARD -m state --state ESTABLISHED,RELATED -j ACCEPT

# ================ Table 'nat', rule set NAT
# NAT compiler errors and warnings:

#
#
# Rule 0 (NAT)
#

echo "Rule 0 (NAT)"

#
# no need to translate
# between DMZ and
# internal net

$IPTABLES -t nat -A POSTROUTING -s 192.168.2.0/24 -d 172.16.22.0/24 -j ACCEPT
$IPTABLES -t nat -A PREROUTING -s 192.168.2.0/24 -d 172.16.22.0/24 -j ACCEPT

Now you can transfer it to the firewall and execute it there to install iptables rules. However it is much more convenient to use built-in policy installer to do this. To use installer, click right mouse button on the firewall object in the tree and use menu item Install. Firewall Builder will compile the policy if necessary and then open dialog where you can configure parameters of the installer. Here you need to enter password to authenticate to the firewall. Once you click OK, installer will connect to the firewall using ssh client. First, it will copy generated script to the directory /etc on the firewall (or different one, if configured in the Installer tab of firewall settings dialog), then it will run this script and check for errors. Its progress will be visible in the panel of the installer wizard, just like the progress of policy compiler.

pict_370

This guide walked you step by step through the process of creating of a firewall object, making some minor changes in its parameters and policy rules, compiling the policy and activating it on the firewall machine. This guide did not touch advanced topics such as built-in revision control system, working with multiple data files, working with multiple firewall objects, IPv6. You can find documentation and guides on these topics and more on our project web site at http://www.fwbuilder.org.

Thursday, August 6, 2009

Computer Tips

SkyHi @ Thursday, August 06, 2009
http://www.davekb.com/browse_

Samba: smbd unable to connect to cups server

SkyHi @ Thursday, August 06, 2009
Q. I have printing disabled in Samba but still puts tons of lines like this in the syslog:`

May 5 09:45:02 www smbd[]: [2008/05/05 09:45:02, 0] printing/print_cups.c:cups_connect(69)
May 5 09:45:02 www smbd[]: Unable to connect to CUPS server localhost:631 - Connection refused

(CUPS = Common UNIX Printing System)
How to I stop this?


A. You really have to hit Samba over the head to disable printing.

After trying many things, this did the trick for me:

load printers = no (this alone isn't enough)
show add printer wizard = no
printing = none
printcap name = /dev/null
disable spoolss = yes

Hope it helps you.

Ubuntu HowTo flash player, GKrellm, VlanPlayer, VMware Workstaion, Update

SkyHi @ Thursday, August 06, 2009
###Install Flash Player###
System --> Synaptic Package Manager --> flashplugin-installer


Synaptic Package Manager Error:
E: Could not get lock /var/lib/dpkg/lock --open (11 Resource temporarily unavailable)
E: Unable to lock the administration directory (/var/lib/dpkg), is another process using it?

Solution:
Close Synaptic Package Manager


#Install vlan player
$sudo apt-get install vlc


###Exit out Remote Desktop Full Screen Mode###


$rdesktop -D -K -g x -z -a -u


Solution:
You can use Ctrl-Alt-Enter to switch between full screen and windowed mode for the remote desktop

Edit: I just read that there can be problems with a composited desktop and using Ctrl-Alt-Enter to switch modes. If this happens you need to change back to metacity (set System -> Preferences -> Appearance -> Desktop Effects to "None")


$sudo aptitude update


nautilus-open-terminal : terminal quick launch


$sudo aptitude install nautilus-open-terminal


###Install VMware Workstation

$sudo sh VMware-Workstation-6.5.2-156735.x86_64.bundle


###Copy and Paste to Terminal Keyboard shortcuts###
ctrl-insert: copy
shift-insert: paste
shift-delete: cut
shift-ctrl-C: copy
shift-ctrl-V: paste

http://ubuntu-tutorials.com/

Wednesday, August 5, 2009

How to publish a good looking code on Blogger?

SkyHi @ Wednesday, August 05, 2009
http://pleasemakeanote.blogspot.com/2008/06/posting-source-code-in-blogger.html

http://hype-free.blogspot.com/2006/10/how-to-publish-good-looking-code-on.html

http://urenjoy.blogspot.com/2008/10/publish-source-code-in-blogger.html

http://blog.giladnaor.com/2009/02/source-code-highlighting-in-blogger.html

http://tips.webdesign10.com/how-to-convert-code-to-html-with-vim

http://webupd8.blogspot.com/2009/03/blogger-publish-code-in-stylish-box.html

To find a word in a file

SkyHi @ Wednesday, August 05, 2009
[root@home ]# find . -type f -exec grep -iH 'Vancouver' {} \;

grep command: Recursively Search All Files For A String

cd /path/to/dir
grep -r "word" .

grep -r "string" .

Ignore case distinctions:
grep -ri "word" .

To display print only the filenames with GNU grep, enter:
grep -r -l "foo" .

You can also specify directory name:
grep -r -l "foo" /path/to/dir/*.c

find command: Recursively Search All Files For A String

find command is recommend because of speed and ability to deal with filenames that contain spaces.
cd /path/to/dir
find . -type f -exec grep -l "word" {} +
find . -type f -exec grep -l "seting" {} +
find . -type f -exec grep -l "foo" {} +


Older UNIX version should use xargs to speed up things:
find /path/to/dir -type f | xargs grep -l "foo"

It is good idea to pass -print0 option to find command that it can deal with filenames that contain spaces or other metacharacters:
find /path/to/dir -type f -print0 | xargs -0 grep -l "foo"

REFERENCES
http://www.cyberciti.biz/faq/howto-recursively-search-all-files-for-words/

Understanding SOA records

SkyHi @ Wednesday, August 05, 2009

To an Administrator, there is nothing more peaceful than a stable and optimized DNS server. The moment something goes wrong, such as a mis-configuration, the server wakes up and starts crying; both sites and email systems goes down. An important way of creating a stable DNS environment is to use SOA records.

What are DNS Records? DNS records or Zone files are used for mapping URLs to IPs. Located on servers called the DNS servers, these records are typically the connection of your website with the outside world. Requests for your website are forwarded to your DNS servers and then get pointed to the web servers that serve the website or to Email servers that handle the incoming email.

This is how a typical Zone file (containing many common DNS records) looks like.

; Zone file for eukhost.com.
@ 86400 IN SOA ns1.eukhost.com. root.manou.eukhost.com. (
2006061904

86000

7200

3600000

86400 )

eukhost.com. NS IN 86400 ns1.eukhost.com.

eukhost.com. NS IN 86400 ns2.eukhost.com.

eukhost.com. 14400 IN A 69.20.54.201

localhost. eukhost.com. 14400 IN A 127.0.0.1

eukhost.com. 14400 IN MX 0 eukhost.com.

mail 14400 IN CNAME eukhost.com.

www 14400 IN CNAME eukhost.com.

ftp 14400 IN CNAME eukhost.com.

SOA Records

An SOA (State of Authority) Record is the most essential part of a Zone file. The SOA record is a way for the Domain Administrator to give out simple information about the domain, like how often it is updated when it was last updated, when to check back for more info, what the administrators email address is and so on. A Zone file can contain only one SOA Record.

A properly optimized and updated SOA record can reduce bandwidth between nameservers, increase the speed of website access and ensure the site is alive even when the primary DNS server is down.

Here is the SOA record. Notice the starting bracket “(“. This has to be on the same line, otherwise the record gets broken.

; name TTL class rr Nameserver email-address

@ 86400 IN SOA ns1.eukhost.com. root.linux5.nettoolz.net. (

2006061904 ; Serial number

86000 ; Refresh rate in seconds

7200 ; Update Retry in seconds

3600000 ; Expiry in seconds

86400 ; minimum in seconds )

• name - mydomain.com is the main name in this zone.

• TTL - 86400 - TTL defines the duration in seconds that the record may be cached by client side programs. If it is set as 0, it indicates that the record should not be cached. The range is defined to be between 0 to 2147483647 (close to 68 years !)

Class - IN - The class shows the type of record. IN equates to Internet. Other options are all historic. So as long as your DNS is on the Internet or Intranet, you must use IN.

Nameserver - ns.nameserver.com. -The nameserver is the server which holds the zone files. It can be either an external server in which case, the entire domain name must be specified followed by a dot. In case it is defined in this zone file, then it can be written as “ns’’ .

Email address – root.linux5.nettoolz.net. -This is the email of the domain name administrator. Now, this is really confusing, because people expect an @ to be in an email address. However in this case, email is sent to [EMAIL=”root@ns.nameserver.com”] root@ns.nameserver.com[/EMAIL], but written as root.ns.nameserver.com . And yes, remember to put the dot behind the domain name.

• Serial number - 2006061904 - This is a sort of a revision numbering system to show the changes made to the DNS Zone. This number has to increment, whenever any change is made to the Zone file. The standard convention is to use the date of update YYYYMMDDnn, where nn is a revision number in case more than one updates are done in a day. So if the first update done today would be 2006061904 and second update would be 2006061905.

Refresh - 86000 - This is time(in seconds) when the slave DNS server will refresh from the master. This value represents how often a secondary will poll the primary server to see if the serial number for the zone has increased (so it knows to request a new copy of the data for the zone). It can be written as “23h88M’’ indicating 23 hours and 88 minutes. If you have a regular Internet server, you can keep it between 6 to 24 hours.

Retry - 7200 - Now assume that a slave tried to contact the master server and failed to contact it because it was down. The Retry value (time in seconds) will tell it when to get back. This value is not very important and can be a fraction of the refresh value.

Expiry - 3600000 - This is the time (in seconds) that a slave server will keep a cached zone file as valid, if it can’t contact the primary server. If this value were set to say 2 weeks ( in seconds), what it means is that a slave would still be able to give out domain information from its cached zone file for 2 weeks, without anyone knowing the difference. The recommended value is between 2 to 4 weeks.

Minimum - 86400 - This is the default time(in seconds) that the slave servers should cache the Zone file. This is the most important time field in the SOA Record. If your DNS information keeps changing, keep it down to a day or less. Otherwise if your DNS record doesn’t change regularly, step it up between 1 to 5 days. The benefit of keeping this value high, is that your website speeds increase drastically as a result of reduced lookups. Caching servers around the globe would cache your records and this improves site performance.

Increasing site speed

The time it takes to access a website on a browser includes the time it takes to look it up on the domain name server. By increasing the “Minimum’’ value, we’re telling the contacting clients to keep their copies of the zone file for a longer time. In effect, reducing the lookups to the nameserver. By reducing the number of times a client has to lookup, we’re increasing the site speed.

However, this also means that if you make changes to the DNS record, it will take longer to propagate. If you require to make frequent updates to your DNS records, make sure your Minimum value is lesser than 1 day. That means longer lookup times, but accurate information for the clients

If you are planning a major update on the DNS zone file(say moving to another server or hosting service), reduce the Minimum value a couple of days prior to the change. Then make the change and then jack up the minimum value again. This way the caching clients all over the world will pick up the changes quicker and yet you do not need to sacrifice on site speed thereafter.

How to improve backup

Always keep a secondary DNS server and keep a higher Expiry value. This will mean that even if the Primary server goes down, the secondary will have the cached copy(for as long as the Expiry value stands) and it will keep serving lookups. Keeping a secondary server but a low expiry value defeats the purpose of a Backup.

How to test SOA records

You have set the new SOA values, and you want to know whether the update has taken place. “Dig’’ is a good tool to troubleshoot and check for DNS information.

For example to check out the SOA records of yahoo.com from all the nameservers, primary and secondary, all you need to do is

# dig google.com nssearch

SOA ns1.eukhost.com. root.manou.eukhost.com. 2006072101 28800 7200 3600 86400 from server ns2.eukhost.com in 1 ms.

SOA ns1.eukhost.com. root.manou.eukhost.com. 2006072101 28800 7200 3600 86400 from server ns1.eukhost.com in 28 ms.


Reference: http://blog.eukhost.com/webhosting/understanding-soa-records/

Learn how to create instant changes to maintain critical information for your DNS and web servers in this case study.

SkyHi @ Wednesday, August 05, 2009

The SOA record controls how fast updated zones propagate from the master to the slave servers, and how long resource records (RRs) are cached in caching servers before they are flushed. Both of these affect your ability to effectuate "instant" changes in the zones you maintain.

Consider the following two scenarios: moving a web server, and moving a DNS server. How instant you need these changes to be depends on how critical you consider the services to be. If you run DNS for an e-commerce site, everything is quite likely to be considered very critical, even if the powers that be want everything to be done cheaply. You need to be able to tell these powers that be how things must be done to make the changes work with DNS.

Moving a Service

Let's consider the case of moving a web server from one housing service to another. Depending on how many machines provide the service, you may or may not be faced with the whole service being offline for "a while"; perhaps by moving machines one by one, you will be able to maintain service for the whole moving period. In either case, you want DNS to serve the new address of the service as soon as it is up on the new site. I'll be moving www.penguin.bv. This is a extract of the penguin.bv zone showing the records affected:

$TTL 804800     ; 7 days
;
@ 3600 SOA ns.penguin.bv. hostmaster.penguin.bv. (
2000041300 ; serial
86400 ; refresh, 24h
7200 ; retry, 2h
3600000 ; expire, 1000h
172800 ; minimum, 2 days
)
NS ns
NS ns.herring.bv.

; WEB, both http://www.penguin.bv/ and
; http://penguin.bv/ with A records

www A 192.168.55.3
; People often send mail to webmaster@www.domain
MX 10 mail
MX 20 mail.herring.bv.
HINFO PC Tunes
@ A 192.168.55.3

Because the default TTL for the penguin.bv zone is seven days, I need to start the work more than seven days ahead of time. The first thing to do is to reduce the TTL for the web server A records. The question is, how low do you set them? Remember, all cached RRs will stay in the cache for the duration of the TTL from the moment they are cached. When moving www.penguin.bv, you'll be turning off the machine, dragging it into a car, driving for 10 minutes, and then getting it up on the new site with a new address. This should take a total of 20-30 minutes. The zone will be updated with the new record right before the machine is turned off. So, within 20 minutes after that, you want all the users to have the new address. A TTL between 5 and 10 minutes would seem appropriate (I'll use 10 minutes). So, at least seven days (the old TTL) before the machine is moved, I set these values for the A records that have to do with the web server:

www     600     A       192.168.55.3
...
@ 600 A 192.168.55.3

Now they will expire after 10 minutes in the caches. Of course, I changed the serial number as well. And then I reloaded the server and checked the logs—so did you, right?

The second problem is that all the slave servers need to be updated immediately when the update is made, or they will continue serving the old records. Many of your clients will keep caching the old updated A records, to their frustration and—not incidentally—yours too.

If you have full access to the slave servers, this is not much of a problem—a simple trick suffices. You can simply log into the slave server, remove the zone file for the updated zone, and restart named. This will cause the named to immediately request the zone from the master, which solves the problem. If you do not control the slave servers, and this is probably much more common, you need to find another way to force the transfer.

Zone Transfer by NOTIFY

The trouble with the NOTIFY request is that it travels by UDP and may be dropped by the network. The "U" in UDP is not for "Unreliable," although it might as well be. Additionally, if a slave does not support NOTIFY, you're out of luck in any case. Also, this is one instance where the very sensible time delay of NOTIFY will be frustrating. You can't know if your server is still waiting out the delay or if the NOTIFY request got lost. Fortunately, though, you can enable more logging in named.conf so you can see everything that happens:

logging {
channel my_log {
file "/var/log/named.db";
severity dynamic;
print-category yes;
print-severity yes;
};
category notify { my_log; };
category xfer-out { my_log; };
};

Run "ndc restart" to pick up the configuration change. Update the zone serial number in the zone, run "ndc trace 3," and then run "tail -f /var/log/named.db" to see what happens when you, finally, run "ndc reload" to load the updated zone:

29-Apr-2000 16:39:50.897 ns_notify(penguin.bv, IN, SOA):
ni 0x400bf728, zp 0x80e188c, delay 24
29-Apr-2000 16:40:14.899 sysnotify(penguin.bv, IN, SOA)
29-Apr-2000 16:40:14.901 Sent NOTIFY for "penguin.bv IN SOA"
(penguin.bv); 1 NS, 1 A
29-Apr-2000 16:40:14.916 Received NOTIFY answer from 192.168.226.3 for
"penguin.bv IN SOA"
29-Apr-2000 16:40:15.084 zone transfer (AXFR) of "penguin.bv" (IN)
to [192.168.226.3].8478

Actually, there will be more unless you "grep" the tail output, but the preceding contains the interesting bits. First, you see that named decides that a NOTIFY is in order, and to delay it 24 seconds. Then, the time to send the NOTIFY arrives and it is sent. A response is promptly received; in short order, the zone is transferred by the slave. This is what is supposed to happen, for each and every slave server. If it does not, it should suffice to do a "ndc restart", because named will issue NOTIFY requests when starting, just in case a zone changed since the last reload or restart. In this manner, you should be able to get the slaves reloaded promptly.

Zone Transfer by Other Methods

If all your slaves do not implement NOTIFY and you do not have full access, you need to get the slaves to check the zone for updates frequently enough so that the zone transfer happens fast enough. Controlling this is what the refresh value is for. If you would like to have the zone transferred within 10 minutes of an update, set the refresh period to 10 minutes. But be sure to do it more than one old refresh interval before the change takes place so that the new, decreased refresh interval is picked up in time. In cases such as the moving of an important server, a refresh period of one minute would not be out of place. And this is quite possibly the simplest way to accomplish this in any case—if you plan ahead. But do increase it again afterward.

The last technique is to call up the admins of the slave servers and arrange for them to be available when the move is made. Then phone around, getting the admins to reload the zone by force, by removing the zone file from the slave servers and reloading as described earlier. This works best if there aren't many of them to call.

Moving a Nameserver

Moving a nameserver is probably easier technically, but involves more people than just the nameserver admin. It also involves all the servers that are slaves of it, and all the servers it is a slave for, as well as all those that delegate domains to it. If you count all this, you find that many things depend on that nameserver, both the function it performs and its IP address. Additionally, if the nameserver is used as a resolving, recursive nameserver by someone, all the resolv.conf files need to be fixed.

Actually, it's not as many as that. Spurious glue records are now avoided, discouraged, and even handled as errors. This means that the number of glue records in need of change is small—it is probably one. It should be the one in the domain above yours that points to your nameserver inside your domain. If you recall the emperor zone within the penguin.bv zone, it contained these records:

emperor         NS      ns.emperor
NS ns.herring.bv.
ns.emperor A 192.168.56.3

The people delegating name service to your nameserver will have a glue record analogous to that in their zone. In this case, the bv TLD admins will have something like this:

...
penguin NS ns.penguin.bv.
penguin NS ns.herring.bv.
ns.penguin A 192.168.55.2
ns.herring A 192.168.226.3


...

So, before moving a server, you will need to notify the admins of the zone above you. It is quite likely, as is the case for penguin.bv, that this is a TLD registrar, and you have to cope with the registrars forms, requirements, and processing time. This means that you don't know when the registrar will change their glue record. But most registrars will not change the glue record unless there is a nameserver giving authoritative answers for the zone at the new address. This precludes you from just moving the name server as soon as possible after the registrar has changed the record. In addition, the TTL on a TLD is likely to be one day, but your superior zone may not be a TLD; in any case, the TTL may be a week, or more. More than week may pass before the entire world knows that your nameserver has moved. That's a lot of time. Plan ahead.

Whether you're right under a TLD or you admin a corporate sub-domain, a good course of action is to first set up a new server and change the NS records within the zone. Then notify the domain above you of the change; only when the glue record has been changed, and has propagated to the slaves and expired from caches, disable the old server. If need be, you can do this by way of a third machine that acts as master temporarily while you move the real host.

Remember, though, the NS record must point to a domain name, and that domain name must point to an A record. It cannot point to a CNAME record. Whenever you move a nameserver, play it straight. Or run quickly—to put things right.


Reference: http://www.informit.com/articles/article.aspx?p=19792

Bloggers

SkyHi @ Wednesday, August 05, 2009
http://www.brandonchecketts.com/

When the internet doesn't see an update to your zonefile

SkyHi @ Wednesday, August 05, 2009

Every once in awhile we see a situation where somebody changes the IP address one of their hostname (A records) points at and the rest of the world still sees the old address.

Common causes of this include:

  • You forgot to increment the zone's serial in the SOA record (*thwap*). Increment the serial and reload the zone again.
  • The nameserver you are using to check your hostname is a resolver / recursor that already has this record in its DNS cache and is answering with its cached data.If this is the case either query a different nameserver or wait for the record's time-to-live (which is set by the "minimum" attribute of the SOA record) to elapse so the nameserver you are querying refreshes it's data.
  • There is an error in the new zonedata. If this is the case the primary nameserver will not even load the new data. If you have local access to the primary nameserver you can tell if this is the case when the serial in the SOA record in your zonefile isn't reflected in what the nameserver answers back for SOA queries.
    Grep your nameserver logs and you'll probably see what the problem is.

Which is all fine for common oversights when making DNS edits. Sometimes however, you've incremented the serial, there are no errors in the zonefile, in fact all the authoritative nameservers have the new IP address but nobody else can see it. What then?

This is far more obscure, but it still happens. What has probably happened is that at some point the host record being changed was used as a nameserver record, that is, it was used in a nameserver delegation for a domain name.

When that happens for generic top level domains (like .com and .net) is that the internet root servers keep an extra glue record for the nameserver hostname in the root nameservers itself, this is done so the root servers can hand out nameserver information for queries about domain names without having to make the extra lookups to the nameservers of the parent domains of each nameserver record.

What all this means if you once used "www.example.com" as a nameserver record (never a good idea, use a distinct hostname like dns1.example.com), and then you go and change the IP address for "www.example.com" in your zonefile, the rest of the internet will not see the new IP address until you go and also update the extra glue record in the root nameservers with the same info.

You could see if this is the case using dig:


$ dig +short @a.gtld-servers.net www.example.com

If you get an IP address back, then there's your problem, you need to contact the registrar for the domain name in question and get this nameserver record edited or if no domains are actually delegated to this hostname, deleted.


Reference: http://www.domainhelp.com/When_the_internet_does_not_see_an_update_to_your_zonefile

Sendmail Temperately Disable User Account

SkyHi @ Wednesday, August 05, 2009
###disable###
root@home]# passwd abc -l
Password changed.


###Unlock###
root@home]# passwd abc -u
Password changed.

Query form disallowed client and unexpected RCODE (SERVFAIL) resolving

SkyHi @ Wednesday, August 05, 2009
Anyway, here's a sample of named.conf

18-Apr-2009 15:07:16.569 unexpected RCODE (SERVFAIL) resolving '155.236.160.65.in-addr.arpa/PTR/IN': 65.160.225.8#53
18-Apr-2009 15:12:35.862 lame server resolving '217.184.124.222.in-addr.arpa' (in '184.124.222.in-addr.arpa'?): 203.130.196.5#53
18-Apr-2009 15:12:36.264 lame server resolving '217.184.124.222.in-addr.arpa' (in '184.124.222.in-addr.arpa'?): 202.134.0.62#53
18-Apr-2009 15:12:46.540 lame server resolving '217.184.124.222.in-addr.arpa' (in '184.124.222.in-addr.arpa'?): 203.130.196.5#53
18-Apr-2009 15:12:46.937 lame server resolving '217.184.124.222.in-addr.arpa' (in '184.124.222.in-addr.arpa'?): 202.134.0.62#53
18-Apr-2009 15:17:31.135 unexpected RCODE (SERVFAIL) resolving 'dns1.datadragon.net/AAAA/IN': 211.147.6.4#53
18-Apr-2009 15:17:31.142 unexpected RCODE (SERVFAIL) resolving 'dns2.datadragon.net/AAAA/IN': 211.147.6.4#53
18-Apr-2009 15:17:31.930 unexpected RCODE (SERVFAIL) resolving 'dns1.datadragon.net/AAAA/IN': 211.147.6.4#53
18-Apr-2009 15:17:31.940 unexpected RCODE (SERVFAIL) resolving 'dns2.datadragon.net/AAAA/IN': 211.147.6.4#53
18-Apr-2009 18:48:36.119 lame server resolving 'dns.opb.interbusiness.it' (in 'opb.interbusiness.it'?): 80.22.52.133#53
18-Apr-2009 18:48:36.121 lame server resolving 'dns.opb.interbusiness.it' (in 'opb.interbusiness.it'?): 80.22.52.133#53
18-Apr-2009 19:24:22.348 lame server resolving '209.60.173.220.in-addr.arpa' (in '60.173.220.in-addr.arpa'?): 202.103.225.70#53
18-Apr-2009 19:24:22.795 lame server resolving '209.60.173.220.in-addr.arpa' (in '60.173.220.in-addr.arpa'?): 202.103.224.70#53
18-Apr-2009 19:24:34.013 lame server resolving '209.60.173.220.in-addr.arpa' (in '60.173.220.in-addr.arpa'?): 202.103.225.70#53
18-Apr-2009 19:24:34.456 lame server resolving '209.60.173.220.in-addr.arpa' (in '60.173.220.in-addr.arpa'?): 202.103.224.70#53
18-Apr-2009 20:08:10.828 lame server resolving 'mail.yenisevgili.net' (in 'yenisevgili.NET'?): 79.171.20.167#53
18-Apr-2009 20:08:11.060 lame server resolving 'mail.yenisevgili.net' (in 'yenisevgili.NET'?): 79.171.20.166#53
18-Apr-2009 23:06:22.822 lame server resolving '139.229.171.203.in-addr.arpa' (in '229.171.203.in-addr.arpa'?): 203.171.230.7#53
18-Apr-2009 23:26:09.587 lame server resolving '217.184.124.222.in-addr.arpa' (in '184.124.222.in-addr.arpa'?): 202.134.0.62#53
18-Apr-2009 23:26:09.852 lame server resolving '217.184.124.222.in-addr.arpa' (in '184.124.222.in-addr.arpa'?): 203.130.196.5#53
18-Apr-2009 23:26:20.128 lame server resolving '217.184.124.222.in-addr.arpa' (in '184.124.222.in-addr.arpa'?): 203.130.196.5#53
18-Apr-2009 23:26:20.527 lame server resolving '217.184.124.222.in-addr.arpa' (in '184.124.222.in-addr.arpa'?): 202.134.0.62#53
19-Apr-2009 02:20:43.263 lame server resolving '217.184.124.222.in-addr.arpa' (in '184.124.222.in-addr.arpa'?): 203.130.196.5#53
19-Apr-2009 02:20:43.657 lame server resolving '217.184.124.222.in-addr.arpa' (in '184.124.222.in-addr.arpa'?): 202.134.0.62#53
19-Apr-2009 02:20:53.941 lame server resolving '217.184.124.222.in-addr.arpa' (in '184.124.222.in-addr.arpa'?): 203.130.196.5#53
19-Apr-2009 02:20:54.316 lame server resolving '217.184.124.222.in-addr.arpa' (in '184.124.222.in-addr.arpa'?): 202.134.0.62#53
19-Apr-2009 04:10:42.705 lame server resolving '217.184.124.222.in-addr.arpa' (in '184.124.222.in-addr.arpa'?): 203.130.196.5#53
19-Apr-2009 04:10:43.090 lame server resolving '217.184.124.222.in-addr.arpa' (in '184.124.222.in-addr.arpa'?): 202.134.0.62#53
19-Apr-2009 04:10:53.358 lame server resolving '217.184.124.222.in-addr.arpa' (in '184.124.222.in-addr.arpa'?): 203.130.196.5#53
19-Apr-2009 04:10:53.743 lame server resolving '217.184.124.222.in-addr.arpa' (in '184.124.222.in-addr.arpa'?): 202.134.0.62#53
19-Apr-2009 04:19:30.922 lame server resolving '139.229.171.203.in-addr.arpa' (in '229.171.203.in-addr.arpa'?): 203.171.230.7#53
19-Apr-2009 05:18:02.844 lame server resolving 'mail.yenisevgili.net' (in 'yenisevgili.NET'?): 79.171.20.167#53
19-Apr-2009 05:18:03.079 lame server resolving 'mail.yenisevgili.net' (in 'yenisevgili.NET'?): 79.171.20.166#53
19-Apr-2009 10:53:35.091 lame server resolving '139.229.171.203.in-addr.arpa' (in '229.171.203.in-addr.arpa'?): 203.171.230.7#53
19-Apr-2009 11:20:03.340 unexpected RCODE (SERVFAIL) resolving '2.0-63.164.243.200.in-addr.arpa/PTR/IN': 200.255.253.241#53
19-Apr-2009 11:20:03.770 unexpected RCODE (SERVFAIL) resolving '2.0-63.164.243.200.in-addr.arpa/PTR/IN': 200.245.255.33#53
19-Apr-2009 11:20:08.453 unexpected RCODE (SERVFAIL) resolving '2.0-63.164.243.200.in-addr.arpa/PTR/IN': 200.245.255.33#53
19-Apr-2009 11:20:08.868 unexpected RCODE (SERVFAIL) resolving '2.0-63.164.243.200.in-addr.arpa/PTR/IN': 200.255.253.241#53
19-Apr-2009 11:55:06.986 unexpected RCODE (SERVFAIL) resolving '155.236.160.65.in-addr.arpa/PTR/IN': 65.160.225.8#53
22-Apr-2009 05:18:36.745 lame server resolving '62.subnet0.195.62.64.in-addr.arpa' (in 'subnet0.195.62.64.in-addr.arpa'?): 64.62.148.143#53
26-Apr-2009 22:54:22.081 unexpected RCODE (REFUSED) resolving 'ns.bta.net.cn/A/IN': 202.106.196.234#53
26-Apr-2009 22:54:22.094 unexpected RCODE (REFUSED) resolving 'ns.bta.net.cn/AAAA/IN': 202.106.196.234#53
27-Apr-2009 02:36:13.366 lame server resolving 'NS.TAILORMADESERVERS.COM' (in 'TAILORMADESERVERS.com'?): 72.9.144.3#53
27-Apr-2009 02:36:13.378 lame server resolving 'NS2.TAILORMADESERVERS.COM' (in 'TAILORMADESERVERS.com'?): 72.9.144.3#53
27-Apr-2009 02:36:13.379 lame server resolving 'NS2.TAILORMADESERVERS.COM' (in 'TAILORMADESERVERS.com'?): 72.9.144.3#53
27-Apr-2009 02:36:13.379 lame server resolving 'NS.TAILORMADESERVERS.COM' (in 'TAILORMADESERVERS.com'?): 72.9.144.3#53

Nearly all those look ups are not ones this server would make. Not sure why they are happening. Anyway, nothing was resolving until I restarted the DNS service. It's working fine now.

I had the firewall service turned on, but the "DNS responsd to outbound queries" filter was allowed (otherwise the server can't resolve look ups to non-local domains, right?). Maybe that's a hole?

Any advice or direction is much appreciated.

...Rene


Rene,

1. That looks like a normal log. It could be that the errors are e-mail going through your mail server. Are you using Postfix and spamhaus to blacklist? The /AAAA/ entries are rejected/unresolved IPv6 addresses.

2. As for your bind named.conf file, to quote Matus UHLAR:
you have probably disabled queries from the world and only allowed from your
local network. you can:

- allow queries to the zone in the zone "dieppeseinemaritime.com" statement
(allow_query)

- allow queries from the whole world to your nameserver and allow
recuesion only from your lan

- run authoritative-only nameserver on different IP that knows this zone and
has recursion disabled

I recomment the last option. For the option 2, don't forget to disable
recursion from the internet - it may cause you problems.

-Wayne

Edit: So no, probably not hacked.


Reference: http://discussions.apple.com/thread.jspa?messageID=9393940