Wednesday, June 6, 2012

Backup your Outlook Express Data: Step by Step..

SkyHi @ Wednesday, June 06, 2012

Outlook express data consists of the several parts.

  • Email messages
  • Account settings
  • Address Book (if used)
  • Mail rules (if any)
  • Passwords

1. Email Messages:

From the Outlook Express menu select Tools | Options | Maintenance and click the StoreFolder button. You see a dialog with the name of the directory that has your mail files. If you look in that directory you find files named after your mail folders and news groups. They all have a .DBX suffix. Outlook Express keeps all messages in these database files. If you make copies of these files regularly, you'll have a safe backup of your OE mail. 
Restore (if necessary): To restore the backup data, just copy it back to the directory. You can selectively restore folders by just copying specific files back. Alternatively, you can use OE's File | Import | Messages feature to import one or more of the backup folders. Email Account Settings
As far as we know, the procedure works for all kind of email: The regular SMTP / POP3 based email, MAPI, IMAP or even the free Hotmail Account, that is built into Outlook. For Hotmail, however, some messages and settings might be stored only at the Hotmail server ( = somewhere at Microsoft !) and not on your local PC.

2. Account settings:

Data about your mail and news accounts are stored in the registry key HKEY_CURRENT_USER\Software\Microsoft\Internet Account Manager. To save this data, start RegEdit and select that key in the left-hand pane. Then from the menu select Registry | Export Registry File. Save the file to a name like "outlook.reg". 
 Restore (if necessary) To restore the account settings, right-click the .REG file and select Merge.
Note: As an alternative, you can save the data one account at a time through Outlook Express: click Tools | Accounts | Export and specify the name of the file to save the settings. Be sure to save this information for every account. 

3. Address Book

Getting the data out of your address book for safekeeping is relatively easy. From the menu select File | Export | Address Book and select the comma separated text file as your output format. Then select the fields you want to export. To make sure you know where the backup is going, give a full path name. To restore the address book or to get your addresses onto a new system, the process is not quite symmetrical. Select File | Import | Other address book and select the text file option again. You'll be given a list of fields to import. Since you're importing a file that was created by Outlook Express, you usually don't need to make any changes here. After that, click your way on through the wizard and you'll get your address book back. 

4. Mail Rules

The mail rules are stored at HKEY_CURRENT_USER\Identities. If you run Regedit and export this entire subkey to a file the same way you did with account settings: from the menu select Registry | Export Registry File. Save the file to a name like "rules.reg". 
Restore (if necessary):  Under the Identities key each subkey has a long number that looks similar to {36753740-2WEE-781D3-89B1-00A0C9900DSA}. So if you have five different identities in Outlook you will have five of these long numbers. Below the numbers are all the settings specific the the identity (signatures, mail rules,...). If you are restoring without reinstall and on the same PC these numbers do not change (as far as we know !) and you can just restore the registry entries by clicking on the reg file.
Moving OE settings to a NEW PC:
If you're moving to a new system or doing a clean install, the {...} numbers are be different and you may have to manually move the entries to the differently numbered entries that are actually being used.
How to do this? This is the method that we use in our office:
1. Export the registry branch on the old PC to a *.reg file. 
2. Transfer this "reg" file to the new PC
3. On the new computer search for the (still empty) settings of your new Outlook Express installation. Once you find, you have the new {...} number!
4. Now, open the transfered*.reg file with a text editor and make a "Search and Replace"
Replace the old {....} value with the NEW {...} that you just located in the registry. 
5. Save this file and then click on it. This will import your old settings in the NEW registry. 

5. Passwords

Outlook Express, along with those of most other Microsoft applications such as Internet Explorer, stores its passwords in .PWL files in your Windows directory. There's a separate file for each username on the system. Backup the files frequently. You can view the content of these files with the FREE "Write All Stored Password" utility from iOpus Software.
6. Recommended Reading:
Last but not least: Microsoft official information on this topic can be found in the following knowledge base articles:

REFERENCES

How To: Transfer your PuTTY settings between computers

SkyHi @ Wednesday, June 06, 2012
PuTTY is tops on the short list of applications I install first on any Windows machine. Over the years I've used PuTTY, I've installed it on a huge number of computers but I've always had one complaint;There isn't a configuration file I can backup or move to a new machine

Getting all the little comfort settings correct for each SSH connection can be a pain. The third time you set emulation, keys, encryption type, etc. for each machine you regularly access, you lose patience. The fifth time you find yourself re-entering settings you might do what I did, find a better way. 

Moving PuTTy settings between computers is an easy task once you know what's involved. We'll find the registry keys where PuTTy stores its configuration information and export them to a file. We'll then use that file we've made to import our configuration on the target machine. 

Exporting Your PuTTy Configuration

Putty stores its settings in the Windows registry. To save a backup of your Putty settings, you'll need to export this registry key to a file. 

HKEY_CURRENT_USER\Software\SimonTatham

(Simon Tatham is the original developer responsible for PuTTy)

1. Click Start->Run and type "RegEdt32" in the "Open" dialog. Click "Ok"


2. One RegEdt32 starts, you'll be presented with an application which looks something like:


3. Press "Ctrl+F" to bring up the Find dialog. Enter the name of the key, "SimonTratham" in the "Find What" field, and make sure only "Keys" is checked in the "Look At" section of the dialog. Finally, click "Find Next"


4. The search may take a while, reminding us that the Windows Registry is a large and mysterious place where dragons be. Let's use these few seconds to reflect on the fact that you should never, ever, never change things in the registry unless you are absolutely, positively, totally, completely, 100%dead sure that you know exactly what you're doing. When the search completes we'll see the key name for which we're looking.


5. Click File->Export. Give your file an appropriate name like, "putty.reg" and click "Save"


6. We're done! Save the putty.reg file somewhere safe. The file doesn't contain any passwords or actual SSH key values so, it's relatively safe from prying eyes. Still, it does contain your configuration and that kind of data is a private matter.

Importing Your PuTTy Configuration

To import your saved PuTTy configuration on any other Windows computer simply copy your exported registry key, right click on the file and click "Merge"


Windows will ask you for confirmation that you want to import this set of registry values. We know this file is safe, because we created it but, you should never import registry information from an unknown source.


That's all you need to know about moving your PuTTy configuration from one machine to another. This can be really useful information when upgrading to a new PC or, if you're an office IT guy where your users all have a standard list of servers they need to connect via SSH, you can create a reference configuration on once machine and "share" it between every computer in the office. 


REFERENCES

Tuesday, June 5, 2012

How To Clear DNS Cache In Mac OSX Leopard

SkyHi @ Tuesday, June 05, 2012

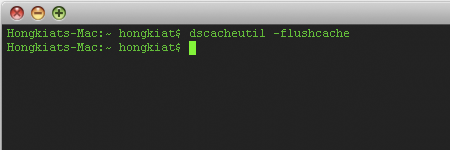
 flushdns leopard How to Clear DNS Cache in Mac OSX Leopard
DNS request are usually cached, that’s good as it help to speeds up the lookups within the samehost but sometimes we will want to clear the cache so it don’t hold the values that are no longer valid. To clear DNS cache in Mac OSX, we can do it with the help of Terminal.

Mac OSX 10.4 And Below

  1. lookupd -flushcache  

Mac OSX 10.5 And Above

However a Mac OSX 10.5 Leopard user will tell you this command will no longer work. In Mac OSX Leopard a new command has been used to replace flushcache. To clear DNS cache in Leopard, use the following command:
  1. dscacheutil -flushcache  


REFERENCES
http://www.hongkiat.com/blog/how-to-clear-dns-cache-in-mac-osx-leopard/

wireless isolation

SkyHi @ Tuesday, June 05, 2012
Enable Wireless Isolation If checked, the wireless client under this SSID can only access internet and it can‘t access other wireless clients even under the same SSID, Ethernet clients or this device. Other clients can‘t access the wireless client, either.

Monday, June 4, 2012

Five Best Android ROMs

SkyHi @ Monday, June 04, 2012

Whether you’re looking to upgrade an Android device forsaken by its manufacturer or you just want more control over the phone or tablet you own, a new ROM is often the way to go. Rooting your phone is the first step, but a new ROM will give you a completely new mobile OS. This week we’re going to look at five of the best Android ROMs.
Photo by Peter Kirn.
It’s important to note that not every ROM is available for every device, and different ROMs are aimed at different audiences — some of them are designed to upgrade the OS, and others are lean and mean installs to speed up your phone. Whichever you choose, you’ll have to make sure your device is supported by the developers behind the ROM before installing.

CyanogenMod

CyanogenMod is arguably one of the most installed Android ROMs in the world. It offers lots of great features, it’s available for more devices than most other ROMs of its type, and it has a level of polish and support that makes it easy to fall in love with.
There are builds of CyanogenMod for Android phones and tablets, and slowly but surely the developers behind CyanogenMod are rolling out Ice Cream Sandwich versions for devices whose manufacturers have given up on upgrading the device entirely. As well, CyanogenMod includes features you won’t find in stock Android, like support for OpenVPN and downloadable themes, plus more privacy tools. You can find a list ofsupported devices here.

Android Open Kang Project (AOKP)

The Android Open Kang Project (AOKP) is a relative newcomer compared to many of the other popular ROMs already available, but it’s rapidly growing in popularity. It offers many of the features that CyanogenMod does, and at first blush you may mistake one for the other. But as soon as you start looking at the options and add-ons, you’ll see the differences. AOKP has earned high marks for add-ons and tools that you can’t get in CM, centralised control over ROM options and more overall customisation options than CM. At the same time, its development community is smaller, and it may not have the same polish and device support that CyanogenMod has. Still, it’s super-fast, it’s stable and definitely worth a look. You can find a list of all supported devices here.

MIUI

MIUI struck us with how beautiful the user interface was and how elegant it made Android look and feel. It’s not the most feature-packed or hackable ROM, but it’s definitely one of the most customisable and elegant, and it’s seriously fast. MIUI started life as a modded version of Android localised in China, but fans of the mod have since localised it for dozens of languages and countries. It offers strong theme support, beautiful stock apps, customisable lockscreens, support for GApps and complete root access. You’re not going to get a wealth of niche features here, but you will get a device that’s much easier and more fun to use once you install MIUI. You can find a list of supported devices here.

Slim ICS

If you have a Galaxy Nexus, Nexus S, Samsung Galaxy S or Galaxy S II, Slim ICS may be the ROM for you. Not only will Slim ICS bring your device up to Ice Cream Sandwich, it’s also a super-thin, lightweight installation that’s remarkably easy to install, even though it’s clearly aimed at advanced users. Slim ICS already has GApps rolled in, so you don’t need to install those later. Where other ROMs try to add lots of new features and tweaking options, Slim ICS is designed to trim the fat down to the bare essentials and give you a fast and clean ICS installation. It’s only available for a handful of Samsung devices, and there’s pretty much one developer and a few beta testers behind the scenes, so don’t expect too many feature additions or new devices. However, it is updated weekly and sports a good number of third-party mods.

Liquid Smooth ROMS

Liquid Smooth ROMS are available for multiple devices. While the project started off with the Motorola Droid, Droid 2, Droid X, Droid Incredible and HTC Thunderbolt, it’s also available for the Galaxy Nexus and a few other devices, although you’ll have to poke around the forums a bit to find them. The banner feature of Liquid is that it’s probably one of the fastest ICS ROMs available — faster even than the stock install that comes on the Galaxy Nexus. You don’t sacrifice features for the speed, but the overall size of the ROM is still nice and small, leaving more space for the apps and features you choose to use as opposed to ones forced on you. GApps are baked right in, and the ROM offers theme support so you can customise it to your liking. All in all, if you have a supported device, it’s probably the leanest, meanest ICS ROM you can download.
No honourable mentions this week, but there are well over 60 different ROMs out there, so whatever ROM you settle on, make sure it’s a good match for the features you’re looking for, the device you own and the version of Android you want to run. These may be our top five, but they may not be the best for your specific device, so do your homework!

REFERENCES

Custom ROMs For Android Explained - Here Is Why You Want Them

SkyHi @ Monday, June 04, 2012

Introduction

Ever wondered what the whole Android custom ROM scene was about?
What is all this talk of installing "aftermarket", custom upgrades on your phone?
Who needs it? Why do it? Is it safe?
Don't fret - I'm here to explain - the AndroidPolice Academy is now in session.
By the way, the word ROM means Read OnlyMemory, but has migrated in the modding community to mean an actual custom OS image that you install into the ROM area of your phone.
Also, the word kernel essentially means the heart of the OS - it's the barebones operating system components.

Custom ROMs

stock ROM is the version of the phone's operating system that comes with your phone when you buy it.
custom ROM is a fully standalone version of the OS, including the kernel (which makes everything run), apps, services, etc - everything you need to operate the device, except it's customized by someone in some way.
So what does the "customized" part mean? Since Android is open source, developers are free to take stock ROMs, modify them, strip them of garbage, optimize them, add things, and pretty much do whatever their imagination and skills allow.

Why You Want Custom ROMs

Update Frequency

Using a custom ROM usually results in more frequent updates that fix bugs and introduce new features because the developer behind the ROM doesn't have the same procedures and red tape that the manufacturer+carrier combo does.
  • A quality update can be churned faster because it doesn't involve the bureaucracy of 30 different project managers, 15 vice presidents, and 5 dozen marketing departments.
  • A ROM developer usually gains a loyal community which beta tests his updates in real life situations and provide feedback, or even fixes bugs - that's the beauty of open source software.
  • Oh and did I mention that ROMs are usually free and supported by optional donations? If you can't afford to pay for it, you don't have to.
  • Finally, most custom ROMs out there are updateable over the air (OTA) and without reinstalling anything.
Who doesn't love open source after this?

Better Performance And Efficiency

Custom ROMs are oftentimes faster, more efficient, and use less memory because
  • the developer ripped out useless garbage, such as carrier installed apps or
  • the developer optimized the kernel. For example, an undervolted kernel can provide a much better battery life than the stock one.

Upgrading To A Better/Later Version Of Android

You can upgrade to a version of the OS that has not yet been released for your device, or never will be. This is possible in 2 situations:
  • leaked version of the new ROM showed up online, and the developer got on it like the fat kid chasing an ice cream truck. This was exactly the case with Hero and Android 2.1, allowing me to upgrade from 1.5 weeks (months) before the official version was available and ditch the bogged down and slow stock OS.
  • ROM from another phone was ported by the developer to work on yours. For example, G1 and MyTouch 3G users may never see Android 2.1 officially released on their phones, but Cyanogen, one of the most respected Android developers, was recently able to create a custom ROM running 2.1 for those devices. Oh, what a happy day it was for MT3G and G1 owners.

Ability To Install Apps To The SD Card

Most custom ROMs nowadays come with the ability to install applications to the SD card, calledApps2SD (or A2SD).
This is currently not possible on stock ROMs, even in Android 2.1 and is supposedly on Google's TODO list.
If you have run out of space on your phone (which I have repeatedly on my Hero), Apps2SD is a killer feature to have.

About That Rooting Business…

Don't confuse custom ROMs with rooting - they're completely different.
We have explained rooting and its benefits in an article called Rooting Explained + Top 5 Benefits Of Rooting Your Android Phone.

The Downsides Of Custom ROMs

Of course, there are dangers of using custom ROMs which you should be aware of.

Something Could Go Wrong

First of all, something may go wrong with the flashing process (that's the process of installing the ROM) and leave your phone in a bricked state. The chances of this are pretty low nowadays, and most of the time you can restore it back to normal.
Try to go for the ROM that has been tested by time and has lots of positive feedback.

Clean Wipe

In order to install a custom ROM, you need to perform a clean wipe.
This means you will lose all existing data, so you have to back everything up first. Of course, just for this, we have a straightforward tutorial that shows how to back up and restore your entire phone: [Complete Guide] How To Fully Back Up And Restore Your Android Phone Using Nandroid Backup.

Potential Problems

Custom ROMs could have bugs… but then so do the stock ones.
However, in case you do find a bug, you actually have a 2-way channel of reporting it - post in the ROM forum and you will more than likely get an answer back and your bug acknowledged.
Try doing this to your phone manufacturer and see if you can get past the first level of outsourced monkeys, let alone actual developers.

You May Void Your Warranty

It's possible that custom rooting will void your warranty because you will "break the seal" on the boot loader by installing a custom one which on some phones apparently can't be undone (this includes the Nexus One). Because of that, the manufacturer might be able to tell that the phone has had a custom ROM installed and not honor the warranty, in case you need to use it.
Now, in most cases, the benefits of the custom ROM outweigh the possibility of your warranty being denied. I recommend getting a warranty from your carrier and using that in case anything bad happens (that warranty is usually unconditional and covers things like losses and physical damage).

Getting The Right Custom ROM

New phones and ROMs come out all the time, and the scope of this article doesn't cover individual ROMs - but the general approach to finding one is Googling for "YOUR_PHONE_MODEL ROM" or something similar, optionally including the wanted Android version. Try it out - you'll find what you want.

Conclusion

And there you have it - another tutorial is in the can, as Leo Laporte likes to say.
Have you found it useful or got anything to add? Please share in the comments.

REFERENCES

What is root or being rooted mean?

SkyHi @ Monday, June 04, 2012
Click the "Show" button below for a root warning / disclaimer:


Here's a few threads (and excepts from each thread) here at AF that already tackle this topic:

what is rooting?


  • Taken from the Cyanogen Wiki CyanogenMod Wiki

    Most carriers "lock" their handsets to discourage customers from taking their handset and moving to another carrier. Carriers also depend on "exclusivity" agreements to encourage users to switch to their plans so they can use a particular handset (e.g., Apple's iPhone on the AT&T network). To use the handset on another carrier's network it would be necessary to "unlock" the handset. This is done with a code based on the IMEI of the handset that can be provided by your carrier or firms on the internet that are slightly more reliable than west African ebay bidders. Unlocking is not possible with CyanogenMod or any other Android replacement. 
    Furthermore, they may impose software limitations to prevent using the handset in a manner that might undercut their voice plans (e.g., Skype, Google Voice), or putting strain on the data network (e.g., tethering, streaming video). The way to get around this is to acquire 'root' (i.e. Administrator) access on the device, so you can install/modify/fix/break anything you want.
  • Rooting directions vary from phone to phone, but a good place to start would be the Android Development forums at XDA-Developers (.com). 

    In and of itself, root only gives you access to secured parts of the phone, just like if you're using using Windows and you have to click that little Run As Administrator prompt. Basically it's a system developed a long while back that keeps the regular day to day operations from being able to have too negative an impact on the rest of the system.

    The positive thing about root is everything it then allows you to do further on down the line including custom apps, configurations and even OS'.

    Here's a nice little Wiki article that gives a little more detail: Why Root - Android Wiki
  • what is it?
    it's all kinda easy...
    imagine your fathers pc:
    you can log in as a user, your father may have allowed you to install stuff. but hey the c:/windows/ folder is locked and you can't screw up the computer.

    android works on linux.
    linux has the following system:
    user
    admin user
    super user

    as a regular android user you are an "admin user". you can install stuff, update, make the screen shiny and just work on it.

    super users can screw up the kernel, over clock the processors (and overheat them by accident), get more sound from the speakers by "over clocking" that to, replace the system with another one, etc.

    this has something to do with the security of the phone and the security of specific folders (with the most important folder called "ROOT").
    like my android milestone is protected in two ways:
    1: the phone's "bios" (protects the phone from weird changes and combines all devices in your phone to a working system)
    2: the phones ROOT (contains all info on how the phone should work)

    the bios must be cracked to make changes in the system (like ROOTing) some nerds do this and post "backups" of this system to xda-developers.
    hackers/programmers make changes to specific files to remove the lock on SU (superuser) and post these in this backups. 

    SU-acces allows you to do things that are not supposed to work like sharing your 3G-connection to wifi. this is blocked till 2.1 because phone carriers din't like that. now with the 2.2 update it becomes legal). or change the folder where your apps are installed from phone memory to the SD card(once again in the 2.2 update they fixed this).

    But, as you can think with your brains. Rooted systems can be broken by the most stupidest terminal commands (since you can just command the phone to blow itself lituraly), or even when you delete a file from the ROOT folder by accident. bricking the phone becomes very easy. that's why phone sellers won't help you as soon as they notice you were using a ROOTED phone.

    you can test if your phone is rooted by downloading a small app called "terminal emulator" and filling in the code:
    SU
    this (SuperUser) command, means that you tell the terminal that you want to start changing important stuff and you need all acces possible.

    If the system is rooted you are presented by a # after you click the Enter(return) button on your keyboard.
    if the system isn't rooted you are presented by the text "No acces" or something like it.

    Rooting is only cool for people who: build their own systems, want to be their 1G phone (very old phone) a bit faster, or just want to prank to their friends on how they ruined their phones (and how much money they have to buy a new one).

    Rooting is not cool for people who: know nothing of terminals and linux systems, are no developers for google, have brains, want to keep their phone carriers friendly,experience that in a pocket they can accidently push buttons and people who want to use their phone the best way possible (it costed manufacturers loads of time to adjust the system in such a way that the phone works the best, why would you screw that up?).

    hope this solves the big question about Rooting.

    but for those people that only read the last line:
    rooting is giving yourself acces to the folder called ROOT, where the system get's it's knowledge on how many volts it should send to the different parts of your phone, and how everything in your phone should work. a good thinking (wo)man wouln't concider rooting for even a second!
  • to get a good understanding of root, read this: What is root? -- definition by The Linux Information Project (LINFO)
  • Here's the Evo info on what root is - Quick INTRO TO ROOTING for those new to rooting
  • Generically speaking, rooting often is nothing more than hitting a known exploit where for a very brief instant, root access becomes available. These injection points are given names, like RageAgainstTheCage. During that time of root vulnerability, a system injection is made to hold the root door open until you're established as root.

    Because they're timing dependent, doing it by hand may or may not require multiple, boring iterations - hence, the methods get scripted (sometime with the necessary iterative loops) and the result are the one-click methods.

What is root?


  • Root - Wikipedia, the free encyclopedia
  • to "root" your phone essentially means to give yourself superuser access on it. This is like being the highest level of administrator for the device. This allows you to change the interface of your phone. Once your phone is "rooted" you can install custom ROMs (they look alot like themes, just google the name and you'll see plenty of examples). You can also download "rooted only" applications for use on the device.

    A "Root" in general is the most basic directory in a system. For instance the Root of your computer most likely is the "C:" drive. Their also happens to be a "Root" of your smartphone, which is what is manipulated in order to achieve a "rooted" phone and its benefits.

what is rooting


  • Android is built upon the Linux operating system, where there is a concept of an administrator user aka "root" that has full permissions to the system. When you "root" a phone, you are enabling access to the root user so you can call on that user to access protected functionality.

    As a regular user, you can request "superuser" access, which is another way of saying that you want root privileges. In a traditional Linux OS, if you log in as root, you can actually create multiple superusers, like a team of administrators, with either complete power, or some subset of power. But for the purpose of Android phones, the only superuser is root, and root always has full access to the system.

    To request superuser access, you would use a shell command called "su." In Android, the su command works in conjunction with an app called Superuser to grant the Android application(s) root access. The Superuser app is included in the rooted ROM; it's something you automatically get when you root your phone.

    Android applications with root access can do a lot more. If you ever see an app on the market that says "for rooted devices only," it means that its functionality requires root access. A normal unrooted phone would not be able to perform that functionality.
  • Quick INTRO TO ROOTING for those new to rooting

What does root or rooted mean?


  • Gaining root access is the equivalent of having admin rights on Windows. 
    If you didn't root it or purchase it from someone who stated it was rooted, then it isn't.
  • With root you are able to access and change all files on your device where as when you arent you can only access the ones the manufacturer want.
    Root is the Unix/Linux term for administrator. It gives you permissions you do not have normally with the regular user permissions
  • To answer the question is in linux you have the opportunity to gain super user access through terminal this is exactly what root does gives you permanent access to root directory of your phone meaning you can mod the phone all you want including erase the operating system and brick the phone on the bad side.
  • To clarify from above: A phone that is NOT rooted can still be modified (you can still make it LOOK different) by using applications like Launcher Pro, for example, and installing Themes. You don't need to root to do this. If your phone is NOT rooted, you can also still access files that are on the SD card and/or on the internal memory, you just can't access _all_ the files on the internal memory. This is an important distinction imho because a complete newb might misunderstand and think he/she needs to root to access any of his/her files.

    1. If you Root your phone, you will be able to access files that you are not allowed to access without root. These are usually important system files, which you don't want to touch unless you know what you are doing because you could screw up your phone.

    2. If you root your phone you can use certain apps that need to access parts of the Android system that can't be accessed without root, but these are mostly obscure (in the past you had to root to tether your phone to your computer to share your data for internet access, for example, but that is no longer necessary).

    3. Rooting lets you delete the bloatware/crapware that often now comes pre-installed by the manufacturers and carriers, and which usually can't be deleted/uninstalled without root.

    4. Rooting lets you install custom ROMs. A ROM is like installing a different version of the Android OS with some changes/tweeks to it, like changing the layout and design of the user interface (UI), or so that you can get a newer version of Android on your phone before the manufacturer releases an update (if they ever even do!).

    These are the main things accomplished by rooting, and it is important to note that if you attempt to root your phone and don't do it properly, you could "Brick" your phone, which means it becomes inoperable.
  • the others have given you good info...
    but to put it more simple...

    rooting is getting access to the ROOT directory of your internal storage. This is how you can get control of all your phone functions that the service carrier has denied you from.

To me, rooting is gaining special access to things on your phone that the carriers and manufacturers didn't intend for you to have (and they often have very good reasons for this, by the way).

To actually gain root access usually (but not always) requires uncovering some exploit that allows you to insert the su program in the /system/bin or /system/xbin directory. Additionally, you also need theSuperuser.apk (whitelist app) to be installed in the /system/app directory. The Superuser app helps you manage which apps are allowed to have root access (i.e., so that not just any app can gain special control of your device).

Additionally, rooting sometimes leads to the ability to overwrite or replace the special partitions (filesystems) on your phone such as the recovery partition so you can install a new, custom recovery that will allow you to install (flash) custom ROMs (i.e., new versions of Android).

Finally, if you do root, take a peek at this thread to help you avoid some pitfalls later on:

Rooting Best Practices

Rooting Best Practices

If you are new to rooting, you might want to be aware of some general guidelines for various root-related activities that might help you avoid some trouble along the way.

Have a fall-back / recovery plan before taking any "scary" (risky) action. In other words, know what steps you'll need to follow if you encounter a problem.

Make a backup before you alter or remove any system-related apps or settings. If you can't make a full, restorable (i.e., a Nandroid) backup, then don't make any changes--doing so without a backup is asking for bootloops or soft-brickings. 

- If your Android device does not support a custom recovery or the ability to make a full device backup (i.e., a Nandroid backup), then you should avoid making any system-related changes that could affect the ability of your device to boot (i.e., modifying or removing system apps, etc.).

Verify the integrity of any files you might flash. This means checking the file size and (MD5) checksum on the platform from which the file is being flashed. If you are flashing from your device, you should check its integrity there there's no guarantee that it matches it original source unless you verify that. If you are are flashing from a PC, you should also check the file's integrity from there, too.

- Be sure to carefully follow the ROM (or theme) dev's installation instructions. If wipes are required, be sure to not miss those steps. The sequences of steps is often very precise and following them correctly will help ensure a successful installation.

- When/if you overclock, be sure to not enable the "set on boot" option until you are sure your device is stable at the selected speed. Also, don't forget to to set a failsafe temperature profile/setting to keep your device from over-heating.

- Also, take care when first using a tool like ROM Manager. It makes doing some root operations very simple, but you might want to become with conversant with how to operate and navigate directly in ClockworkMod custom recovery. This way, you will be prepared for the possible eventuality when you really need to manually operate in ClockworkMod custom recovery. So, your first forays with flashing ROMs might be best done manually.

Let me know if you have any other things to add or expand on in the above. 

REFERENCES
http://androidforums.com/faqs/443432-what-root-being-rooted-mean.html
http://androidforums.com/faqs/450904-rooting-best-practices.html