Thursday, February 4, 2010

Configuring SendMail with Dovecot and SASL Authentication

SkyHi @ Thursday, February 04, 2010
Here is the steps that I followed for Configuring SendMail with Dovecot and SASL Authentication]

1)Install the following packages on the server.

[root@server1 ~]#yum install  sendmail-8.13.8-2.el5
[root@server1 ~]#yum install  sendmail-doc-8.13.8-2.el5
[root@server1 ~]#yum install  sendmail-cf-8.13.8-2.el5
[root@server1 ~]#yum install cyrus-sasl-lib-2.1.22-5.el5
[root@server1 ~]#yum install cyrus-sasl-devel-2.1.22-5.el5
[root@server1 ~]#yum install cyrus-sasl-gssapi-2.1.22-5.el5
[root@server1 ~]#yum install cyrus-sasl-2.1.22-5.el5
[root@server1 ~]#yum install cyrus-sasl-plain-2.1.22-5.el5
[root@server1 ~]#yum install cyrus-sasl-md5-2.1.22-5.el5
[root@server1 ~]#yum install dovecot-1.0.7-7.el5

2)Make sure that host name entries are correct in the /etc/hosts file.

Entries will be like this:-
[root@server1 ~]# cat /etc/hosts
127.0.0.1 localhost.localdomain localhost
66.71.249.201 server1.openhelp.info.  server1

3) Setup the RDNS for the server IP address.

Here the IP address of the server is 66.71.249.201
Make sure that the forward and RDNS are setup  correctly.
[root@server1 ~]# host 66.71.249.201
201.249.71.66.in-addr.arpa domain name pointer server1.openhelp.info.

[root@server1 ~]# host server1.openhelp.info.
server1.openhelp.info has address 66.71.249.201

4)Configure The /etc/resolv.conf File

Check for the name server entries in the /etc/resolv.conf.
Entries will be like this:-
[root@server1 ~]# cat /etc/resolv.conf
domain openhelp.info
nameserver 208.67.220.220
nameserver 208.67.222.222
The MX record for your domain must point to the IP address of the mail server.

5)Configure the send mail configuration file.

For that you need to edit the /etc/mail/sendmail.mc file.
Make sure that the following lines are not commented:-
DAEMON_OPTIONS(`Port=smtp, Name=MTA')dnl

 dnl DAEMON_OPTIONS(`port=smtp,Addr=::1, Name=MTA-v6, Family=inet6')dnl
Comment out the SMART_HOST Entry in sendmal.mc.
The mail server doesn’t need a SMART_HOST entry in its sendmail.mc file.
Comment this out with a dnl at the beginning.
dnl define(`SMART_HOST’,`mail.my-site.com’)
Execute the following command to regenerate sendmail.cf.
[root@server1 ~]#make sendmail.cf -C /etc/mail
You may also use the following command to  generate a new sendmail.cf file:
[root@server1 ~]#m4 /etc/mail/sendmail.mc > /etc/mail/sendmail.cf

6)Configure access.db

Make sure that the following entries are there:-
[root@server1 ~]# cat /etc/mail/ access
localhost.localdomain           RELAY
localhost                       RELAY
127.0.0.1                       RELAY
129.82.99.147                   RELAY
The IP address entries in the /etc/mail/ access can only relay mail throgh the server.
You’ll then have to convert this text file into a sendmail readable database file named /etc/mail/access.db.
Execute the following commands:-
[root@server1 ~]#cd /etc/mail
[root@server1 ~]#make

7) The /etc/mail/local-host-names File:-

The domain entries which is present in the /etc/mail/local-host-names  can only receive the mails in the server.
Entries will be like this:-
[root@server1 ~]# cat /etc/mail/local-host-names
openhelp.info
server1.openhelp.info

8) The /etc/mail/virtusertable file

A virtusertable is a database that maps virtual domains into news addresses. With this feature, mail for virtual domain on your network can be delivered to local, remote, or a single user address.
Example entries:-
[root@server1 ~]# cat /etc/mail/virtusertable
james@openhelp.info james
shane@openhelp.info shane@gmail.com
@openhelp.info admin
@tuxplanet.com tux
First column is the  the target email address and the second column is  the local user’s mail box or  a remote email addressor a mailing list entry present in the  in the /etc/aliases file to which the email should be forwarded.If matching entries are not there in the /etc/mail/virtusertable, then sendmail checks the email address in the /etc/aliases fle.After editing the file /etc/mail/virtusertable execute the commands:-
[root@server1 ~]#cd /etc/mail
[root@server1 ~]#make
These commands will convert the entries in the file /etc/mail/virtusertable to a sendmail-readable database file named /etc/mail/virtusertable.db

9)The /etc/mail/aliases file

The aliases database contains a list of virtual mailboxes that are expanded to other user(s), files, programs or other aliases.
Here are a few examples that can be used in /etc/mail/aliases
[root@server1 ~]#cat /etc/mail/aliases
root: jack
hacker : john,mark, kat
abuse:: /dev/null
procmail: "|/usr/local/bin/procmail"
The file format is simple; the mailbox name on the left side of the colon is expanded to the target(s) on the right. The first example simply expands the mailbox root to the mailbox jack,
which is then looked up again in the aliases database. If no match is found, then the message is delivered to the local user jack. The next example shows a mail list. Mail to the mailbox hacker is expanded to the three local mailboxes john,mark and kat .  The next example shows writing mail to a file, in this case /dev/null. The last example shows sending mail to a program, in this case the mail message is written to the standard input of /usr/local/bin/procmail through a UNIX® pipe. When this file is updated, you need to run make in /etc/mail/ to update the database.

10)Configure saslauthd

Saslauthd is a daemon process that handles plaintext authentication requests on behalf of the SASL library.  The server fulfills two roles: it isolates all code requiring superuser privileges into a single process, and it can be used to provide proxy authentication services to clients that do not understand SASL based authentication.
By default authentication mechanism is the local shadow password file. But here we are using PAM.
Entries should be like this:-
[root@server1 ~]# cat /etc/sysconfig/saslauthd.
# the default is "shadow", but we're using "pam"
MECH=pam
# these two settings are the defaults
SOCKETDIR=/var/run/saslauthd
FLAGS="-n 2"
Check the  /usr/lib/sasl2/Sendmail.conf file and make sure that the following entries are there:-
[root@server1 ~]# cat /usr/lib/sasl2/Sendmail.conf
pwcheck_method:saslauthd

11)Make sure that saslauthd is started at boot time.

root@ [~]#chkconfig saslauthd on

12)Configure PAM

Make sure that the following entries are there in /etc/pam.d/smtp
root@ [~]# cat /etc/pam.d/smtp
auth required pam_stack.so service=system-auth
account required pam_stack.so service=system-auth

13) Configure dovecot

Check the /etc/dovecot.conf file add/uncomment the following line:-
protocols = imap imaps pop3 pop3s

14)Restart the following services:-

[root@server1 ~]#/etc/init.d/saslauthd start
[root@server1 ~]#/etc/init.d/sendmail start
[root@server1 ~]#/etc/init.d/dovecot start

REFERECES
http://openhelp.net/2010/01/18/configuring-sendmail-with-dovecot-and-sasl-authentication/

Bookmarks Favorite Howto

SkyHi @ Thursday, February 04, 2010
Random:
  1. http://beginlinux.com/blog/
  2. http://beginlinux.com/server_training/web-server
  3. http://www.cyberciti.biz/
  4. http://www.debianhelp.co.uk/index.php
  5. http://kernelhardware.org/
  6. http://www.cyberls.com/forum/forumdisplay.php?fid=6
  7. http://serverfault.com/questions/tagged/sysadmin
  8. http://serverfault.com/questions/tagged/raid
  9. http://almamunbd.blogspot.com/
  10. http://secfx.wordpress.com/
  11. http://blog.spind.net/tag/centos/
  12. http://distrostuff.com/tutorials/centos
  13. http://howtonixnux.blogspot.com/
  14. http://nadeausoftware.com/
  15. http://actychen.blogspot.com
  16. http://mymcp.blogspot.com/
  17. http://www.networkdatacenterhost.com/wiki/server-administration/index
  18. http://conigliaro.org/
  19. http://www.cherpec.com/
  20. http://piyecarane.wordpress.com/
  21. http://www.linuxconfig.org/Page-3
  22. http://ittidbits.com/blog
  23. http://servertune.com/kbase/10/

ISP Tutorials:
  1. http://wiki.mediatemple.net/w/Home
  2. http://cloudservers.mosso.com/index.php/CentOS_5.4
  3. http://www.yolinux.com/TUTORIALS/

Howto
  1. http://www.akadia.com/html/publications.html#Unix-Linux-Apache%20Publications
  2. http://www.khoosys.net
  3. http://www.vps.net/forum/public-forums/tutorials-and-how-tos/
  4. http://www.brandonchecketts.com/
  5. http://2bits.com/contents/articles
  6. http://www.softpanorama.org/index.shtml 
  7. http://www.linux.com/learn/tutorials 
  8. http://www.linuxforums.org/articles/
  9. http://www.thegeekstuff.com

CentOS
  1. http://www.securecentos.com/system-prep/
  2. http://security-24-7.com
  3. http://www.adminsehow.com/category/centos/
  4. http://cloudservers.mosso.com/index.php/CentOS_5.4
  5. https://wiki.fourkitchens.com/display/PF/Documentation
  6. http://consultancy.edvoncken.net/index.php/HOWTO
  7. http://longvnit.com/blog/
  8. http://blog.mydream.com.hk/category/howto
  9. http://centoshacker.com/
  10. http://linuxadminzone.com/
  11. http://davidatenney.wordpress.com/category/centos-5-4/ 
  12. http://www.1a-centosserver.com/

UBUNTU
  1. http://www.unixmen.com/
  2. http://www.webupd8.org/

DNS
  1. http://dnscog/com
  2. http://network-tools.com


SECURITY
  1. http://blog.sucuri.net/

Windows Servers
  1. http://jameskovacs.com/

IPv6
  1. http://www.cyberciti.biz/faq/category/ipv6/

Tutorials
  1. http://www.tizag.com/
  2. http://www.w3schools.com/default.asp

    Install IDE Hard Drive

    SkyHi @ Thursday, February 04, 2010
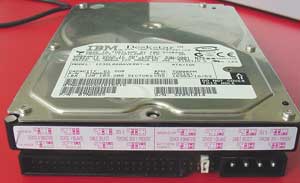
    This guide is for installing an IDE drive. If you're opening up something an OEM machine you could be voiding your warranty so check first.
    When you try to install a really big hard drive into a lot of older systems, you'll find that the BIOS is only capable of seeing 137 GB. On even older mainboards you'll find a 32 GB limit. To get around this you'll want to use that install disk that came with the hard drive or if you're a relatively advanced user a BIOS update should be available. The install disk comes on a floppy so if you don't have one then you'd better be able to do a BIOS update.
    Before you start
    • Do not drop or bump the drive.
    • Keep the drive in the protective anti-static container until ready to install.
    • Protect the drive from static discharge by wearing a grounded wrist strap. Attach the wrist strap to the metal chassis of your computer.
    • Handle the drive by the edges of the frame.
    • Do not apply pressure or attach labels to the circuit board or the top cover of the drive.
    • Turn off the power to the host system before installation.
    What you need
    • Phillips screwdriver and four 6-32 UNC drive mounting screws.
    • Standard 40-pin ATA interface cable, or an 80-conductor cable if running UATA66/100 (max length: 18 inches).
    • An unused drive power cable for your new drive.
    • Needle-nose pliers for removing or adding jumpers.
    DO NOT put a CD Drive on the same channel as your hard drive! Most modern CD drives are ATA33 while the modern hard drives are ATA133. A drive can only transfer as fast as the slowest device on the channel.
    Let's Begin
    Unpack everything. Drives come defaulted to be ready to be installed in a single drive environment.

    First of all Master, Slave? What is this? They had to be called something. The master can also be referred to as the "primary" drive with the slave being the "secondary". A lot of people like to use what is called Cable Select.(use cable to determine drives) If you want to do that you'll just have to make sure that it's plugged into the right part of the cable.
    Wonder what connects to where on the cable?

    If you want to make it the master or the slave, you will have to look around the drive to find where the instructions are. You'll see some kind of diagram that looks like this:

    It's not currently set, but you can fairly easily tell from the diagram what you'll need to set it for. There is a sample about Seagate hard drvie jumper setting.
    Setting the Jumpers
    • Master or Single Drive - Use this setting if the drive is the only drive on the ATA interface cable.
    • Drive is Slave - Use this setting if the drive is an additional drive on the cable and the original drive is set as Master.
    • Master with non-ATA compatible drive - Use this if the drive is Master to a CD-ROM, tape drive or other non-ATA drive.Note: It is preferred to have the CD-ROM and other non-hard drive products on the secondary ATA channel.
    • Cable-Select Option (Default) - Use with Ultra ATA cables. This allow the cable to select if the drive is master or slave based on the position on the cable. The Master drive goes on the black connector at the end of the cable, the slave drive connects to the gray connector in the middle and the host adapter connects to the blue connector at the other end of the cable.
    • Limit Capacity Option - This option may be required if the system the drive is being installing into does not support the full capacity of the drive. If the limit capacity jumper is installed you will need to use a drive overlay program such as the one installed by Disc Wizard Starter Edition.
    The figure below depicts the jumper settings for the U-Series and Barracuda ATA drive families (most Seagate ATA drives above 20 GBytes). If you have an older drive please visit our Technical Library and find your model number for details on jumper configuration.

    Install hard drive
    Before you install the new drive make sure you unplug the power connector from the computer. Anytime you mess with anything inside your computer it is a good idea to unplug it. It's also a good idea to touch the power supply before you go sticking your hands in there! Static discharge can jump and do some bad things. Just touch the power supply for a precaution OK?
    Open up your computer case.


    Now you should be able to find an open 3.5" slot somewhere.
    Slide the drive into an available slot and find 2 or 4 case screws. Two if you're lazy and only screw things in on the side. Four if you never touch anything in your system. For that you will have to pull off both side panels to your case. The case screws are bigger than the ones used to screw in your CD drives.


    After the drive is secured then go ahead and connect the power and IDE cables. On the edge of one of the cables you will see a line. Normally it's red on the grey cables and white on black cables etc there will be some kind of colored line to indicate pin 1. This pin always goes on the same side as the power connector.

    To connect the IDE cable to the motherboard you'll have to find something that looks like this:

    Each connector represents 1 IDE channel. Most boards have 2 channels while 4 is becoming more and more common at least on the higher end boards.
    Each channel can have 2 devices on it.
    When you first start your machine enter into the BIOS and make sure the drive was identified properly. Generally it's the [del] button that gets you into the BIOS but sometimes it's F1 or F2. You should be able to see some kind of message on the screen when it first posts indicating what you need to push.
    Once you're in the BIOS you'll want to go into standard CMOS where you should see something like this:

    Run the system setup program.
    Enable LBA mode and UDMA mode, if applicable.
    Select the auto-detect option.
    Save and exit the system setup program.
    If your drives are showing up properly then you did it right. If they aren't then you've got some troubleshooting to do. First of all look go back to the front page in your BIOS and select integrated peripherals. Make sure that both IDE channels are enabled. Most likely you set your jumper wrong.
    Partitioning the drive in Windows 2000/XP/Vista/Windows 7 and Windows server 2000/2003/2008
    If you install a new drive and want to use it in Windows, you must partition the hard drive first! Note: If you want to recover data from the "OLD" drive, Don't do this!
    And there are some ways to partition the hard drive actually, say, partition the hard drive under Disk Management or use the third party partition manager tool like EASEUS artition Master to manage the hard disk directly, etc.
    EASEUS Partition Master, comprehensive hard disk partition tool and system optimization software for Windows-based administration, enables you to easily partition the hard disk or change/extend partition without data loss under Windows 2000/XP/Vista/Windows 7 and Windows server 2000/2003/2008. It also offers some basic and advanced features like create, delete, resize/move, format, copy partition for better Windows hard disk management. More features…
    Certainly, retail packaged hard drives will have an install disk for you. You also can partition hard disk with it. If this new drive is going to be your main drive then use the partition application that is built into Windows 2000/XP/Vista/Windows 7 and Windows server 2000/2003/2008. If your using Windows 9x (why?) then you'll want to check out bootdisk.com and find something that'll cover your needs. You'll need to fdisk this. Since most of people are using Windows 2000 or XP, so overleap all the steps in fdisk. The basal step is:
    • Boot into Windows 2000/XP/Vista/Windows 7 and Windows server 2000/2003/2008.
    • Open Computer Management and select Disk Management.
    • Initialize the drive.
    • Partition the drive.
    • Format the drive.
    • Assign the drive letter.
    • Initiate changes.
    If this is being installed as a secondary storage drive for Windows 2000/XP/Vista/Windows 7 and Windows server 2000/2003/2008, then you can go into the built in utility called "Disk Management". Go into the Control Panel -> go under Administrative Tools -> Computer Management -> Storage -> Disk Management.
    Look on the bottom right and you'll see something that looks like this picture. The disk with all of the unallocated space is what you're after. Right click on it. Select New Partition.

    A wizard will pop up and walk you through this process. Choose a partition size. If this is a secondary drive then you're obviously after pure storage space so just make it a primary partition and allocate 100% of your space to it.

    The followed screen looks like this. Just clicking next until you get here.

    If you're only using Windows 2000/XP/Vista/Windows 7 and Windows server 2000/2003/2008, we would suggest using NTFS. If you're dual booting then Fat32 would probably be a good idea if the other OS can't read NTFS.
    For NTFS the default cluster size is 4K which is pretty much the best tradeoff between speed and storage space.
    Volume label is nothing other than the name you want it to be called.
    Make sure you select quick format or else it'll be a while before you can use the disk.
    Click next it's just a summary of what you told it to do.
    Click next and soon the new drive is available.
    Troubleshooting
    No hard drives show up:
    Do you have two drives on the cable? Make sure both of the drives aren't set for the same setting (master or slave).
    Make sure the power is plugged in and everything is connected securely.
    Verify the drive is enabled in system BIOS. If not, select the auto-detect option.
    The hard drive doesn't even power up:
    Check to make sure the IDE cable is connected correctly. You will see some kind of stripe running down the side of the cable that will indicate pin 1. Pin 1 is almost always the closest to the power connector. If you have this backwards the drive will normally either be silent or fail to power up.
    Is the full capacity of the hard drive being seen:
    Verify the BIOS has auto-detected and LBA mode is enabled.
    My hard drive is slow:
    Make sure you have your CD/DVD drives plugged into a different channel/cable. Most modern CD drives are ATA33 while the modern hard drives are ATA133. A drive can only transfer as fast as the slowest device on the channel.
    My hard drive doesn't have the jumper settings on the label:
    Find the model number and visit the manufacturers website. The should have some instructions posted. If not, email their support.
    My 40 GB hard drive only show up as 38.2 GB:
    The formatted space will always be a bit less than the advertised storage capacity. This is supposed to happen, don't worry. It is a difference in the way the OS and the manufacturers measure drive size. Hard drive manufacturers use round figures for sizing (1000MB = 1GB instead of 2^40 bytes = 1GB) whereas operating systems show the exact version.
    See More: Install IDE Hard Drive | Install SATA Hard Drive | Install SCSI Hard Drive


    REFERENCE
    http://www.easeus.com/resource/install-ide-hard-drive.htm

    Force FSCK on Reboot

    SkyHi @ Thursday, February 04, 2010

    Scenario / Question:

    How do I force a fsck on the file system

    Solution / Answer:

    To force fsck that is used to check and repair Linux file systems. Fsck should always be run on unmounted file system. By invoking fsck while the system is starting or booting like on a reboot, you can ensure that all file systems are unmounted. To do this create a file in the “/” directory called “forcefsck”.

    Force fsck on a boot using /forcefsck

    On boot linux looks for a file called “forcefsck” in the root “/” directory. If this file exists then the system will invoke a full file system check on boot.
    To create the file you first need to be the root user:
    $ su -
    Create a the file forcefsck in the root directory:
    # touch /forcefsck
    Reboot the system:
    # shutdown -r now
     
    REFERENCES
    http://www.kernelhardware.org/force-fsck-reboot/ 

    Centos How should I run fsck on a Linux file system

    SkyHi @ Thursday, February 04, 2010

    Scenario / Question:

    I need to check file system for errors using fsck. Can I run fsck on a mounted file system ?

    Solution / Answer:

    Running fsck on a mounted file system can result in data corruption. The two options are:
    1) Change the running state of the system to single user mode and unmount the file system
    What if you need to run fsck on the root / file system ?
    2) Boot the computer into Rescue Mode using the installation CD

    1) Single User Mode and umount the file system

    Issue command to change run level and umount the /home file system that is mounted on /dev/sda2
    # init 1
    # umount /home
    Run fsck:
    # fsck /dev/sda2

    2) Rescue Mode using installation CD ( to run fsck on root /)

    Insert the Installation CD into the drive and reboot your system:
    # shutdown -r now
    After booting from the Installation CD and presented with the installation command prompt type:
    linux rescue nomount
    Once you are at the system command prompt you need to run mknod. Because we started Rescue Mode with the “nomount” option, no file systems were initialized and no device files were created. If we try to run fsck on a file system it will fail. We need to use mknod to create the block or character special file.
    To use mknod we need to know the Minor and Major numbers of the device.
    # ls -l /dev/sda
    8 0
    # ls -l /dev/sda2
    8 2
    # mknod /dev/sda b 8 0
    # mknod /dev/sda2 b 8 2
    Run fsck and force the check and attempt to automatically repair:
    -y — cause the fs-specific fsck to always attempt to fix any detected filesystem corruption automatically.
    -f — force a check even if reported in a clean state
    -v — Produce verbose output, including all file system-specific commands that are executed.
    # fsck -yvf /dev/sda2
    LVM Partitions
    In order to be able to run fsck on lvm partitions we need to find the pv’s, vg’s, lv’s and activate them.
    # lvm pvscan
    # lvm vgscan
    # lvm lvchange -ay /dev/VolGroup00/LogVol_home
    # lvm lvscan
    
    # fsck -yfv /dev/VolGroup00/LogVol_home
    LUKS Partition
    In order to be able to access an encrypted LUKS partition user cryptsetup.
    cryptsetup luksOpen
    – is the device path
    – is the name of the unencrypted mount that can be accessed by /dev/mapper/
    # cryptsetup luksOpen /dev/VolGroup00/LogVol_home home
    # Ener LUKS passphrase for /dev/VolGroup00/LogVol_home
    # fsck -yvf /dev/mapper/home
     
    REFERENCES
    http://www.kernelhardware.org/how-should-run-fsck-linux-file-system/comment-page-1/

    Wednesday, February 3, 2010

    yum update to specific kernel version

    SkyHi @ Wednesday, February 03, 2010
    Question:

    On rhel 5.3 I want to update to kernel version "2.6.18-128.8.1.el5" due to a security patch.

    when performing:

    <code>yum check-update | grep kernel
    kernel.x86_64 2.6.18-164.2.1.el5 rhel-x86_64-server-5
    kernel-devel.x86_64 2.6.18-164.2.1.el5 rhel-x86_64-server-5
    kernel-headers.x86_64 2.6.18-164.2.1.el5 rhel-x86_64-server-5
    </code>

    But 2.6.18-164.2.1.el5 correspond to rhel 5.4, and I dont want to move to this version, I want to keep rhel 5.3.

    I tried yum update kernel-2.6.18-128.8.1

    But it seems to be the wrong way. How could I update the server to this specific kernel version?


    Solution:

    You are on the right track. You just didn't specify the kernel version the way yum expects it. The correct command would be

    yum install kernel-2.6.18-128.8.1.el5

    (Note that kernel packages are not updates for each other, each of them is a separate install, and the old ones remain until you run "rpm -e".)


    How can I keep the RHEL version static (e.g. RHEL 5.1)?

    Question:

    For compatibility with a program :

    • I need to keep one of our servers in a specific version, for example rhel 5.1
    • I would like to keep it as updated as possible, but not to change versions.

    What should I do:

    Configure yum?
    Configure satellite repository?


    Solution:

    Do not update the package called redhat-release-5Server-

    <code>$ rpm -qf /etc/redhat-release<br />redhat-release-5Server-5.3.0.3<br /></code>

    Make sure to pin that package. If you do edit /etc/yum.conf and put this in it

    <code>[main]<br />exclude=redhat-release-5Server-*<br /></code>

    yum would refrain from updating that package and that would keep /etc/redhat-release at its current version.

    Not sure why you would want this though...


    REFERENCE
    http://serverfault.com/questions/70821/yum-update-to-specific-kernel-version

    Linux Home Server HOWTO

    SkyHi @ Wednesday, February 03, 2010
    Linux Home Server HOWTO
    Previous Home Next

    © Miles Brennan, howto (at) brennan . id . au

    Revision History:

    - Version: FC5 - 1.0 18 June, 2006 Updated by: Miles Brennan
    • Updated whole site to suit Fedora Core 5 specific configurations.
    • Added SSL/TLS link encryption configurations for IMAPS, SMTP, L2TP (VPN) and LDAP protocols.
    • Added Dynamic DNS / DHCP configuration for server.
    • Adding VPN, MRTG and System Backup chapters (currently drafting).
    - Version: FC3 - 0.01
    21 November, 2004
    Authored by: Miles Brennan
    • First version of the Linux Home Server HOWTO, published for Fedora Core 3.

    Powered By:

    Powered By Apache 2.2 !
    Powered By Fedora Core 5 !


    This HOWTO will explore the concepts and configurations for establishing a fully functional Internet connected network environment for your home or small office. This setup uses a dedicated Linux server as the gateway device to provide all of your network connections, Web / Email / FTP servers, packet filtering firewall, and most of the other services required to configure and secure a complete small scale network.

    This documentation is developed specifically for the Fedora Core versions of Linux, however the configurations will still be suited to most Linux distributions that use the same applications and configuration settings.

    1. Introduction

    2. Planning Considerations

    3. Installing Linux

    4. Network Configuration

    5. Broadband Connectivity

    6. Firewall Concepts

    7. Package Management

    8. Domain Name System (BIND)

    9. Network Time Protocol

    10. DHCP Server

    11. Squid Web Proxy

    12. Sendmail Server

    13. Apache Web Server

    14. FTP Server

    15. System Printing

    16. Secure Shell

    17. MySQL Server

    18. Samba

    19. Network File System

    20. Shared Address Book (LDAP)

    21. Virtual Private Networking (DRAFTING)

    22. Multi Router Traffic Grapher (DRAFTING)

    23. System Backup (DRAFTING)


    Previous
    Home Next


    REFERENCE
    http://www.brennan.id.au/index.html